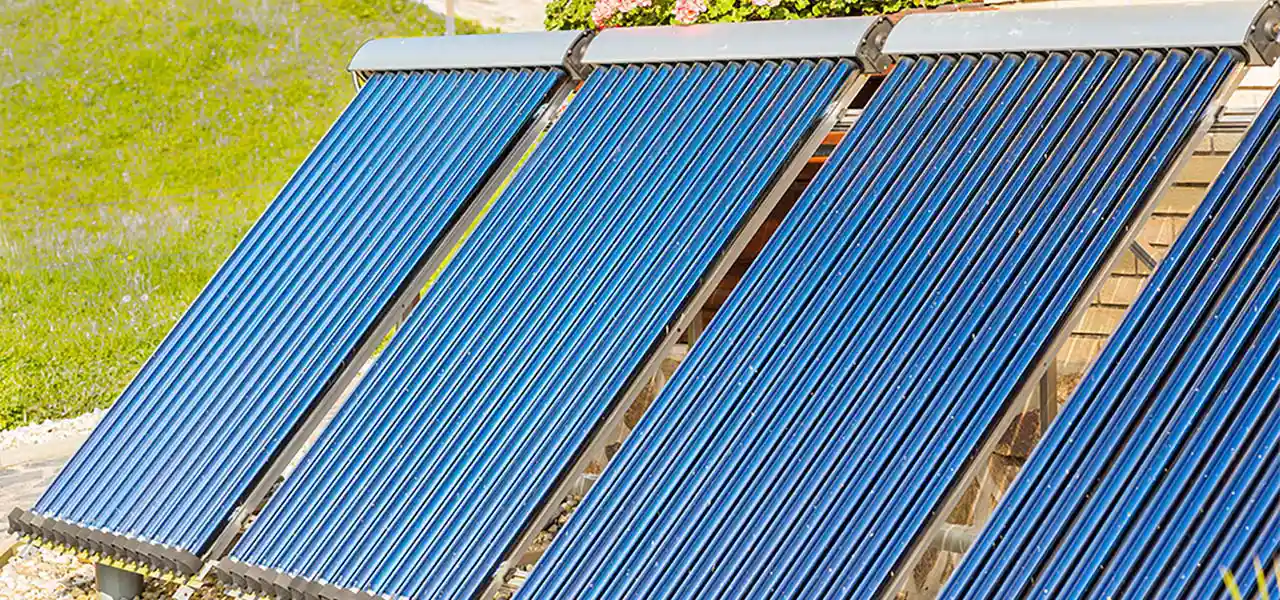
Exposed to the outside air on all sides except for the floor, above ground pools can lose heat more easily than in-ground pools. If you battle this heat loss with an electric or gas heater, heating the pool comes at a great expense. There is, however, an affordable solution — a solar powered pool heater. Above ground solar pool heaters require more room than a compact gas or electric unit. However, with good installation and placement, solar heater panels are just as out of sight as any other heater. Plus, they pay for themselves with the savings in heating expenses!
Above Ground Solar Panel Installation
The installation of an above ground solar pool heater involves three steps:
- Building the rack
- Securing to the rack
- Plumbing connections
Building a Solar Panel Rack
The rack is very useful in a solar pool heater application. Sure, you could just lay the panels on the ground, but they will last longer and absorb more heat when mounted on a triangular rack, built at an angle to the sun. Mounting panels on a roof may be too much vertical lift for smaller above ground pool pumps.
A solar panel rack is a simple contraption that does several things:
- Keeps solar panels clean and protected
- Gives the appropriate pitch for maximized sun exposure
- Allows for easy draining of the pool water through the system
Building the Rack

The rack is often something that is not included with the purchase of solar panels, which is why most installations are custom-built by the owner or a professional installer. When it comes to the construction of the rack, it is really nothing more than a wedge that props up the panels to give them a pitch of about 35 degrees off the ground.
You can use pressure treated two-by-fours to build the frame, topped with 4×8 plywood sheets. Or, you can build a frame with angle iron or strut channel, bolted together — a more expensive option. Painting the rack or platform black can help protect the wood and help to blend it visually. And will add a bit more absorption of the solar energy.
If you have a hillside not far from the equipment, you could build a flat rack, position it on the hillside, and run pipe across the yard, or bury the pipe. A flat rack can also be made easily with 4- or 8-foot plywood, pitched at 35 degrees.
Securing a Solar Panel Rack
Once the solar rack has been built, secure it to the ground to keep the solar panel installation from collapsing in high winds. Long rebar pieces, bent at the top is a good method to secure the rack to the ground.
As you assemble the solar panels and stretch them across the rack, take care to properly connect the panel segments snugly together. Use the directions and materials included with your solar panels to secure the solar panels to the rack.
Straps and screws are commonly included with most systems to secure panels to a roof or rack. You can use pipe clamps, from any hardware or home store. I’ve seen adhesives like Liquid Nails used to further secure the solar panels to the solar rack, but not if you plan to store your solar panels inside during the winter.
Once the panels have been secured to the solar rack we’re ready for plumbing!
Above Ground Solar Pool Heater Plumbing
The plumbing is just as simple as any of the other steps in the installation. That being said, ask yourself two questions before connecting the pipes coming out of your filter to the solar heater panels.
1. Do you want to install a valve to be able to bypass the solar panels?
2. Do you want to automate this process with a solar controller?

A bypass valve, either two two-way valves or one three-way valve, will allow you to control the speed through the panels (slower speed is generally better, under 10 gpm), and allow you to bypass the panels at night, or when it’s not sunny. This is important, because when the panels are cooler than the water, running your pool water through the panels will cause your pool water to lose heat! So in general, you should always install a bypass valve to give you the options of solar-on and solar-off.
An optional but recommended upgrade, a solar controller includes a bypass valve and an automatic valve-turner device. The panel has a thermostat knob, and when conditions are right, the sensors will signal the controller to open the bypass valve and send water through the solar panels. When conditions are poor for solar heat, the bypass valve is automatically closed. Solar controllers create optimum solar absorption, and I highly recommend them for all serious solar pool systems.
What else?
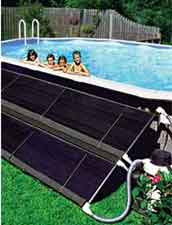
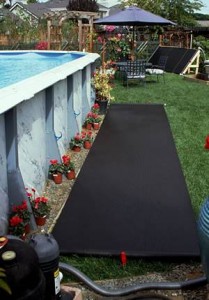
For those that are looking for the easiest possible install, again, you could just lay the panels right on the ground on the sunny side of the pool. You do have the option to forgo a solar rack and a diverter valve or controller. Especially if you run your pump only during the sunny hours of the day.
One other comment, and answer to the question “How many solar panels do I need?”. Solar pool heaters are modular, and the more panels you have, the more square footage of sun absorbing panels, the greater the heat transfer.
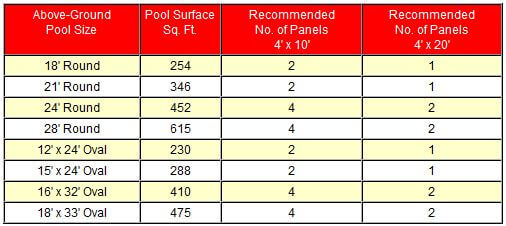
With one 4-inch by 20-inch panel, you can probably realize 5-10 degrees temperature rise on most above ground pools. Double the panels, and you’ll get double the heat! Other factors come into play too, like amount of hours of full sun, position of panels, amount of wind and whether you use a pool cover or solar blanket.
Once everything is all installed, check the system for leaks, give the panels the initial few minutes to warm up, and you’re ready to begin heating your pool! Remember to keep your pool covered at night to minimize heat loss!
Is there a solar building
that can be constructed around an above the ground pool?
Hi Holly, not a pre-fab, that I am aware of, but you could certainly build one!
Thanks for the information. Do you have a manual/video showing how to tap into the pump itself? I think I have the racking down. Now I need to figure out how to tap the pump and then return the heated water to the pool. Any help is appreciated. Recommendations for the panels?
Thanks.
Hi Tom, You actually tap into the return pipe, after the pump and filter, just before the pipe turns to go into the ground, you install a 3-way valve, like a Jandy/Compool/CMP valve. From the valve, the water can either go to the panels, to the pool, or as it is – a little both of both. A pipe from the 3-way valve carries water up the side of the house, or over to the rack, and connects into a lower corner of the solar array. The exit pipe, coming out of the panels, will connect to a Tee fitting, installed in the return line, after the 3-way valve, maybe on a vertical portion of pipe, just before it goes into the ground. Now for a check valve, to keep water from looping. A one-way check valve is used on the pipe coming from the solar panel, just before the Tee fitting, this will keep water from going backwards thru the solar system. So to recap, you need a 3-way valve, a tee fitting, and a check valve, in addition to pipe and fittings. A solar controller is recommended for automatic control of the 3-way valve, to optimize heat gain during the day. My favorite solar panels are Enersol, even though we don’t sell them 🙁 – I’m working on them though! If you google solar plumbing, then look at the “Images” tab, you can find lots of schematics or diagrams, with more detail than I can perhaps describe. Good luck, have fun – solar pool heaters are awesome!