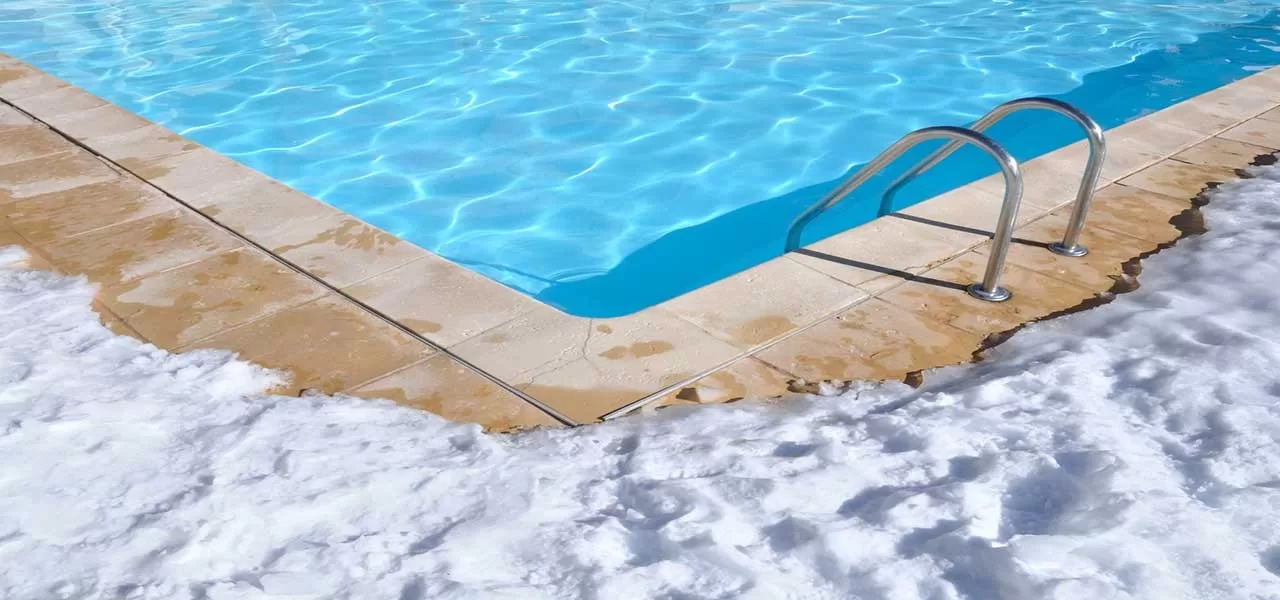
When the long summer days come to a close, it’s time to think about how and when to winterize your inground pool. Some people don’t need to winterize their pool — we’re looking at you, sunbelt region! — but if you live in a colder climate, it’s a good idea to let your pool hibernate.
As with everything pool related, there is a specific process for winterizing your pool. It’s an easy process to follow.
How to Winterize Your Inground Pool
Winter pool closing steps must be done in a very specific order to ensure an easy pool opening the following spring. Follow the guidelines below to close your own swimming pool this winter!
1. Remove Ladders and Accessories
Loosen the ladder anchor socket bolt. When it rises about 1/2 inch, knock it down with a heavy wrench. Wiggle the ladder loose so the pool cover will fit properly. Inspect your ladder treads closely for cracks, and tighten any loose ladder bolts. Most ladders can be stored outside, but plastic steps may do better if stored inside. Also remove any handrails, fill spouts, eyeball fittings, pool cleaners and skimmer baskets. Store in a safe place where you can easily find them again in the spring.
2. Balance Water Chemistry
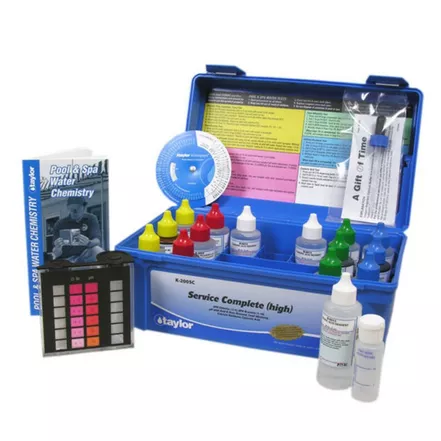
It’s important to start winterizing with balanced pool water chemistry. Test and balance the water chemistry, and adjust any chemicals if necessary. Balance water chemistry a few days before closing your pool to allow the chemicals time to disperse. Adhere to the following ranges for balancing water chemicals:
- pH: 7.4–7.6 ppm
- Total Alkalinity: 80–120 ppm
- Calcium Hardness: 200–400 ppm
- Chlorine: 2.0–4.0 ppm
Brush and shock your pool to remove any algae or other organic materials before closing your pool.
3. Clean the Pool
Skim, vacuum, and brush the pool thoroughly, in that order. The pool should be spotless when you cover it. Remove every bit of organic matter possible, and give the pool one final skim (if necessary) before covering it for the winter. The cleaner the pool is when you close it, the better it will look next spring. Any debris or algae left in the pool during closing will dilute the strength of the winterizing pool chemicals.
4. Lower the Water Level
Lower the water level of your inground pool between 6-12″ below the bottom of the tiles, if you have a pool safety cover. For solid covers, only lower the water a few inches below the skimmer. Never lower the water level more than 18″, doing so can increase stress on your safety cover and cause the cover to rip or pull the anchors out of your deck.
If you are using a solid winter pool cover, lower the water level 3–4″ below the bottom of the skimmer opening, unless you’re using a skimmer plug. Skimmer plugs seal off the opening of your skimmer and keeps water out.
5. Turn Off System Components
Turn off the pilot, shut off the gas supply, and turn the gas valve to OFF, on your pool heater. For gas heaters with pressure switches hanging down connected to a siphon loop, disconnect the pressure switch to drain the copper tubing. Open the drain plugs on both intake and outlet headers, making sure your heater is free of pool water.
Shut off power to the pump, light and heater at the circuit breaker box. If you have a timer clock for your pool pump, turn it off and remove the timer trippers, also known as timer dogs. Disconnect power to any other electrical components that you don’t want to operate during the winter, such as a salt system or chemical pump.
6. Add Winter Closing Kit Chemicals
For this step, we highly recommend using a chlorine-free pool closing kit. These kits come with everything you need, and are packaged according to the size of your pool. They include chlorine-free pool shock, a strong winter algaecide, a stain and scale preventer, a slow-release floater with oxidizing chemicals. Shocking the pool just before adding algaecide can be a problem, as high chlorine levels break apart the polymer chains in algaecide and render it useless.
If you are not using a winter closing kit, be careful when using chlorine floaters. They can sink, tip over, or get stuck next to a wall, which will stain a pool’s vinyl or plaster surfaces during the winter. Use a high quality winter algaecide, a stain and scale preventer (chelator or sequestering agent) and some form of oxidizer to winterize your pool. Also, be sure to use non-chlorine shock, or only use chlorine shock 5-7 days before closing, to protect your winter algaecide.
If you have a mesh safety cover, we recommend using a pool enzyme product to help control algae growth during the winter. Also helpful is to check the water chemistry during mid spring, about a month before opening, and add another quart of algaecide or refill the floating chemical dispenser.
7. Drain Pump and Filter
Diatomaceous Earth (D.E.) filters should be opened up, and the filter grids should be hosed clean and inspected for rips or tears (mild staining is usually OK). Cartridge filters should have the cartridge removed and cleaned thoroughly. In both cases, after cleaning, reinstall the filter media back into the tank for winter storage. Lubricate any filter o-rings you come across in the process.
Adding antifreeze to your pump can damage the pump seal, so this should be avoided at all costs. It’s much better to completely drain all the water from the pump and filter system, including the chlorinator and heater, or any other pool equipment containing water.
After blowing the lines, place your grid assembly or filter cartridge back in the tank for safekeeping during the winter. Secure the filter lid and clamp band securely before and after blowing lines. Loose filter clamp bands can cause the filter lid to blow off during start-up, with hazardous results.
8. Blow Out Water Lines
The best way to avoid pool freeze damage is to “blow out the lines” when you winterize your inground pool. Use a small air compressor at low psi or a high volume blower, like a Cyclone vacuum/blower or a powerful shop vac. Blow air through all equipment and pipes, both to and from the pool, and use pool plugs to prevent water from flowing back into the return lines. You’ll also want to install a skimmer guard to absorb the pressure of expanding ice and keep your skimmer from cracking. If you want to add non-toxic pool antifreeze to the lines for added peace of mind, now is the time to do it.
9. Fill Water Bags or Lift Safety Cover Anchors
Safety covers will have a series of anchors around the pool, which are recessed flush against the pool deck while the pool is in use. Use an anchor hex key tool to twist the anchors and bring them up to the surface.
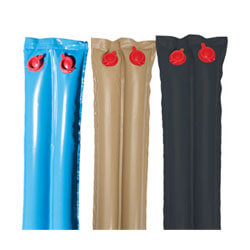
If you are using a solid winter pool cover that requires water bags to hold it in place on the pool deck, fill the water bags where they will lay. If filled elsewhere, be careful not to drag or drop the water bags as they are moved around the pool. Fill bags only 80% full to allow expansion as the water freezes. Keeping several small pails or pans of water around the pool is a good idea to keep birds and critters from poking holes in the pool water bags for a drink. If you want something a little more durable than thin water tubes, you can also try using a product like Aqua Block, which will hold up to many years of use.
Above ground pools should use an Air Pillow, also called a pool pillow or an ice equalizer pillow, to absorb the expansion of the ice and prevent the ice sheet on the surface from putting pressure on the pool walls. Only inflate the air pillows roughly 60%–80%, so you don’t burst them.
10. Cover the Pool
Skim the pool again if needed, so the pool is as clean as possible. Clean off the pool cover too, to avoid bringing dirt and debris into your freshly cleaned pool. As you spread the cover over the pool, inspect closely for tears or rips. If possible, move these problem areas to the deck or close to the edge, and don’t place your cover pump over the tears. Apply cover patches as needed — there are poly patches for solid winter covers, and mesh or solid patches for safety covers. Secure the cover with water bags (inground winter cover), straps and anchors (safety cover) or a cable-&-winch assembly (above ground winter cover), depending on the type of pool cover you’re using.
That’s all there is to it! Follow these steps, and you will winterize your inground pool in no time. Once it’s closed, keep your pool cover as clean and dry as possible, and adjust as needed to keep it secure. Remember that solid pool covers with water bags are not safety pool covers, and can be dangerous for kids or adults who accidentally fall on top of them. Restrict access to the pool area during the winter, and keep an eye on the kids!

Is there a particular order in blowing the lines for winterizing our inground pool? We have 2 skimmers so there’s the main line and then 2 other lines going to each skimmer. Where should I start?
Hi Dan, yes, I usually blow out the second skimmer from the first skimmer, the one that the blower is connected to. Then I would plug the other skimmer, and flip around the valve diverter, or ‘deadhead’ a 3-way valve to keep air from blowing into the pump, and thus send air back thru the main drain line, to blow out the MD. More info here: https://blog.intheswim.com/how-to-blow-out-pool-lines-for-winter/
Good Morning. I have a Hayward EcoStar SP3400VSP pump. I changed the time on the pad to match the time with the timer. It worked for a few days and I noticed it stopped. The error message is : DRIVE ERROR. PUMP HAS STALLED. Also , the CHECK SYSTEM indication is on. I tried to get into the Config menu by simultaneously pressing the left and right arrow but the pump tries to start and therefor could not get into the menu. I there anything else I can do? I would like to go back to factory settings. Thanks
Hi, see page 22 of the owners manual, for reset instuctions https://hayward-pool-assets.com/assets/documents/pools/pdf/manuals/EcoStar.pdf Drive Error! Pump has stalled “Indicates that the drive has lost control over motor shaft rotation, or that the drive was not able to start the motor after 3 attempts. Motor connections to drive should be verified”. It can be a major fault, requiring a new drive, or not if you’re lucky!