Spring is around the corner, and that means it’s almost time to open the swimming pool for a fun-filled summer. While opening your inground pool might seem like an overwhelming task, we’re here to help you out. We’ve put together this easy-to-follow inground pool opening procedures article, so you can stay on target and open your pool like a pro!
1. Remove Pool Cover
The first inground pool opening step is taking off your pool cover. After being on your pool for the entire winter, your cover will likely be a bit dirty. If you have a leaf catcher on the cover, carefully take it off and dispose of the leaves and debris. Use a leaf rake to scoop up any debris on top of your cover if you don’t have a leaf catcher.
Once all the leaves and debris are gone, place a cover pump on top of the cover to remove any standing water. It’s important to drain your pool cover to prevent the melted snow or rainwater from getting into your pool. After draining the cover, gently take it off your pool and set it in a large flat area to clean. Once clean and dry, fold the cover and place it in a cool, dry storage area.
2. Add Water to Pool & Remove Plugs
Part of the pool closing process is lowering the water level in your pool to avoid damaging your pipes. Now that it’s time to open your pool, you’ll need to raise the water level a bit before turning on your plumbing equipment. Using your garden hose, add fresh water to your pool until the water level is halfway up the mouth of the skimmer.
Then remove all the plugs or Gizzmos installed in your pool returns and skimmers, and replace return fittings and skimmer baskets.
3. Pump & Filter Equipment
Now it’s time to start reassembling or reinstalling your pool filter, pump, and chemical feeder. Replace the drain plugs, using new Teflon tape, and lubricate o-rings with a silicone pool lube. Check all equipment and verify all clamp bands are tight and secure, to keep loose lids from flying off.
Open all the valves before and after the pump, and open the air bleeder on top of the filter. Prime your pump before starting the motor, by opening the lid and filling with water. If you have a multiport valve, start the system with the valve in the “Waste” position, to flush out any dirty water in the skimmers and drain. Once there is a steady stream of water, shut off the pump, and switch to the filter position.
When sending water through the filter, keep an eye on the pressure gauge and shut off the pump quickly if the pressure spikes. This could indicate you have a closed valve, or plugs still in the pool, or bad filter media.
Reassembly and Lubrication of an Inground Pump and Filter
- For DE and Cartridge filters, inspect the filter inside of the tank.
- Lubricate manifold o-rings and the belly-band o-ring.
- Install the filter drain plug or cap and pressure gauge with Teflon tape.
- Install the filter clamp band securely and carefully.
- Lubricate a push-pull valve, or slide valve.
- Wrap pump drain plugs in Teflon tape and tighten with pliers.
- Lubricate the pump lids, chlorinators, Nature2 o-rings.
- If you open any unions, lubricate the union o-ring.
- If you have a heater, install brass drain plugs with green lube.
- For gray Jandy valves, fill grease cap with silicone lube.
Which Lubricant is Best to Use?
Use Teflon lubricant, like Jacks 327 and Magic Lube, for pool o-rings. Using Vaseline or petroleum based lubricants will eat away at the rubber and ruin a pool o-ring. Brass plugs can use a Green lube like Aqua Lube or Magic Lube Green, with Kevlar.
4. Check for Leaks
Inspect your pool and equipment for any leaks or cracks that might have developed over the winter months. Very small drips on the equipment sometimes seal themselves, or you may need to replace a fitting or the thread sealant. Check out our article, “Leaking Pool Pump!“, for more information on locating and repair pump leaks.
If your water level was unusually low when the cover was removed, check the wall surface for any voids at the water level.
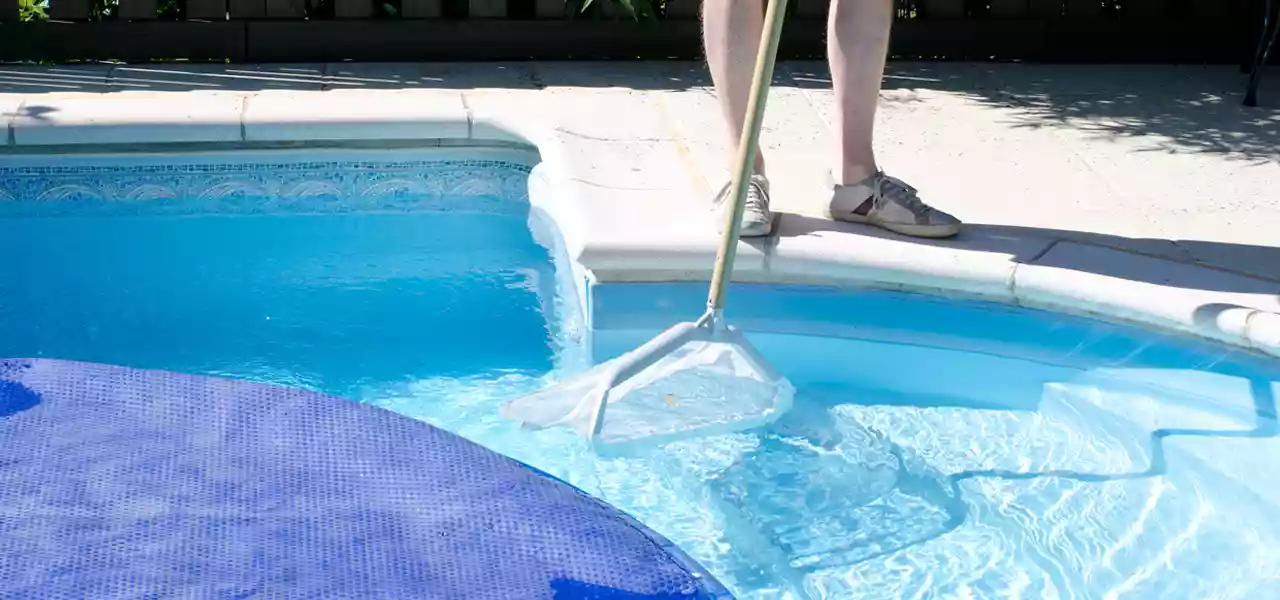
5. Clean the Pool
Even if you used a quality pool cover and your pool looks fairly clean, you should still brush and vaccum it. Thoroughly scrub the walls and floor with a pool brush to loosen any dirt or algae that’s taken up residence. After brushing, manually vacuum the pool with your multiport valve set to “Waste”, or turn your automatic pool cleaner on. Use our Super Tile & Vinyl Cleaner on skimmers, tiles, and coping stones.
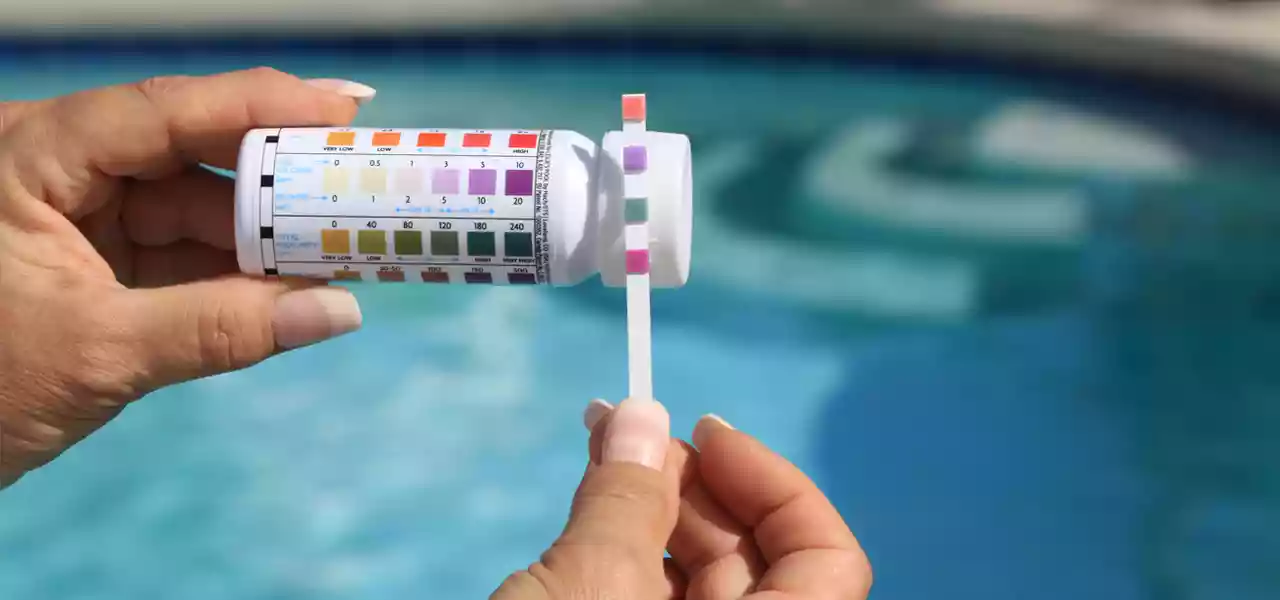
6. Balance Chemicals
Now you have come to the most important part of pool opening — balancing the pool water chemistry! Although you added proper chemicals and balanced the water before closing your pool, you need to adjust the pool once again during the opening process.
First, test the chemical levels in your water using a pool test kit, so you know exactly which chemicals you need to add to adjust your pH, Total Alkalinity, Calcium Hardness, and Stabilizer levels. Balancing the water before you shock the pool helps the pool shock work more effectively.
While balancing your water might sound like a lot of work, we’ve made it easier than ever with our Pool Opening Kits! These kits have everything you need to open your pool, like clarifier, algaecide, stain & scale remover, and of course, pool shock. Having all the right chemicals on hand will save you time and money during pool opening.
7. Deck Equipment
Once your filtration system is running and water chemistry is adjusted, you can install your pool ladder, handrails, diving boards, and any other equipment. Check the deck equipment for any cracks or damage, and repair or replace any equipment quickly to keep your swimmers safe.