Second in a series, as a follow-up to last weeks above ground pool cover hacks, today we turn the spotlight on in-ground pool safety covers.
Having personally installed hundreds of safety covers, I’ve learned a few tricks to make a pool safety cover perform better and last longer.
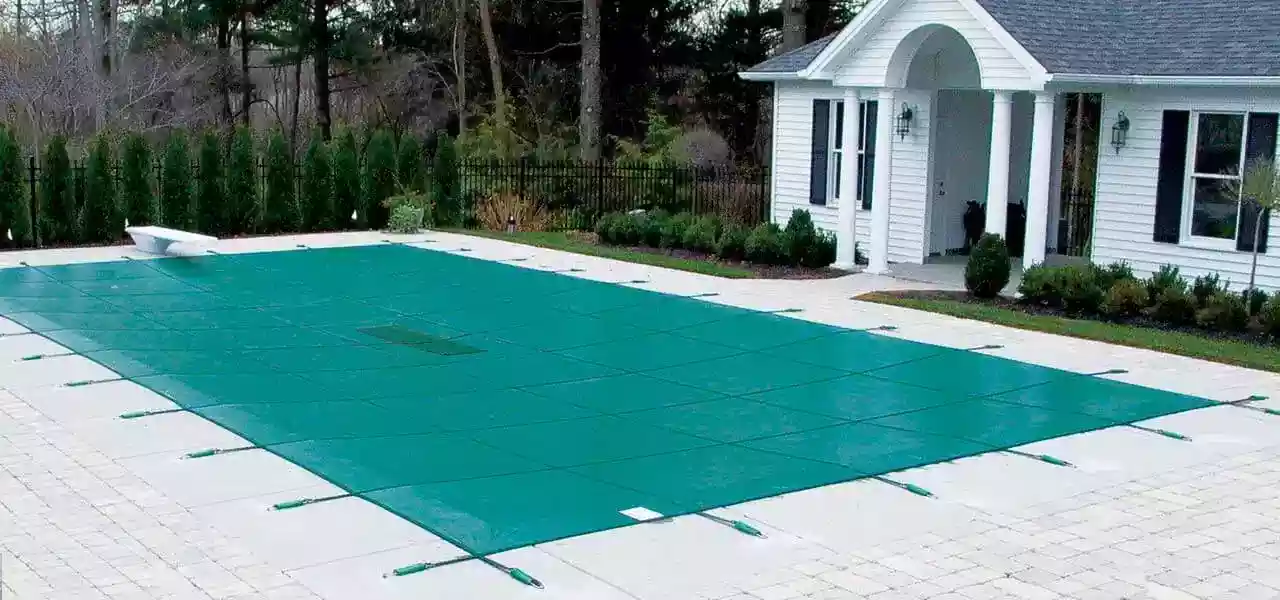
Hack #1: Using Water Tubes to Block Wind

For most safety cover owners, they’ve never given high winds much thought. Strong gusts can slip under the cover, causing it to chatter, or bounce up and down. Over several years, this can wear through the fabric where the cover crosses the edge of the pool. High winds also push leaves under the cover, using up winter algaecide and causing pool stains and ‘bath tub’ rings.
Water Tubes (or Aqua Blocks) are normally used on non-safety pool covers, but as needed, can be used on one or more sides of your safety cover, to stop wind and leaves from getting underneath the cover. I think the Black Double Tubes look the best.
Hack #2: Easily Replace Non-Working Anchors

Every safety cover has them – brass deck anchors that either won’t screw up, or won’t screw down. So much so – that I wrote an entire post about pool cover anchor problems. To summarize, there are 3 methods to replacing a brass anchor, the ‘Chip & Pry’ method of removal, drilling a new hole next to the non-working anchor, or using our ‘Anchor Yanker‘ tool for extraction.
The Brass Anchor Removal Kit is an affordable tool to drill into the head of a non-working anchor, tap the hole with threads, insert a bolt and then with the magic of leverage, turn the bolt to easily raise the entire anchor out of the deck.
Hack #3: Cover Mate to Trap Debris / Block Sun

I once had a pool closing customer who would have us install his mesh safety cover, and then over top of that, we stretched a solid winter pool cover, weighing it down with 4×4 lumber and placing a cover pump. Eventually, we replaced the old mesh cover with a solid safety cover, for a two-in-one solution.
If your pool opens green each spring, give the Cover Mate a try, to block sun and debris from entering the water. Cover Mate floats on the pool surface, blocking 100% of sun from reaching the water, while the textured surface traps debris and dust that blows under or passes through the cover.
Hack #4: Pool Magic Enzymes for Easy Spring Clean-Up

Pool safety covers have a dirty little secret that we don’t like to mention on the product pages. As they age, fibers shrink, and allow progressively more sunlight and fine dust to filter into the pool water. Mix sun, water and organics together, and the most basic life forms on the planet, algae, will easily grow.
Enzymes consume the organic matter, and remove most of the nutrients available to sustain a hungry algae plant, which suppresses algae growth, even into late spring. With a dose of added clarifer and phosphate remover, Pool Magic Spring & Fall + PhosFree offers clean and clear pool openings.
Hack #5: Keeping the Pool Water Level Below the Tile

A small bit of maintenance required of every safety pool cover owner is to keep the water level from getting too high in the pool. Even for safety covers that are drum-tight, there is still some deflection in the center. When pool water levels rise to touch the cover,the wet-spot in the middle of the cover will warm the water and trap dirt and debris, turning your cover into a giant tea bag.
A small cover pump, placed into the skimmer well, or onto the top step under the cover, is the easy way to keep water level 6-8″ below the cover. A $35 investment makes a large difference in water clarity and color during spring opening.
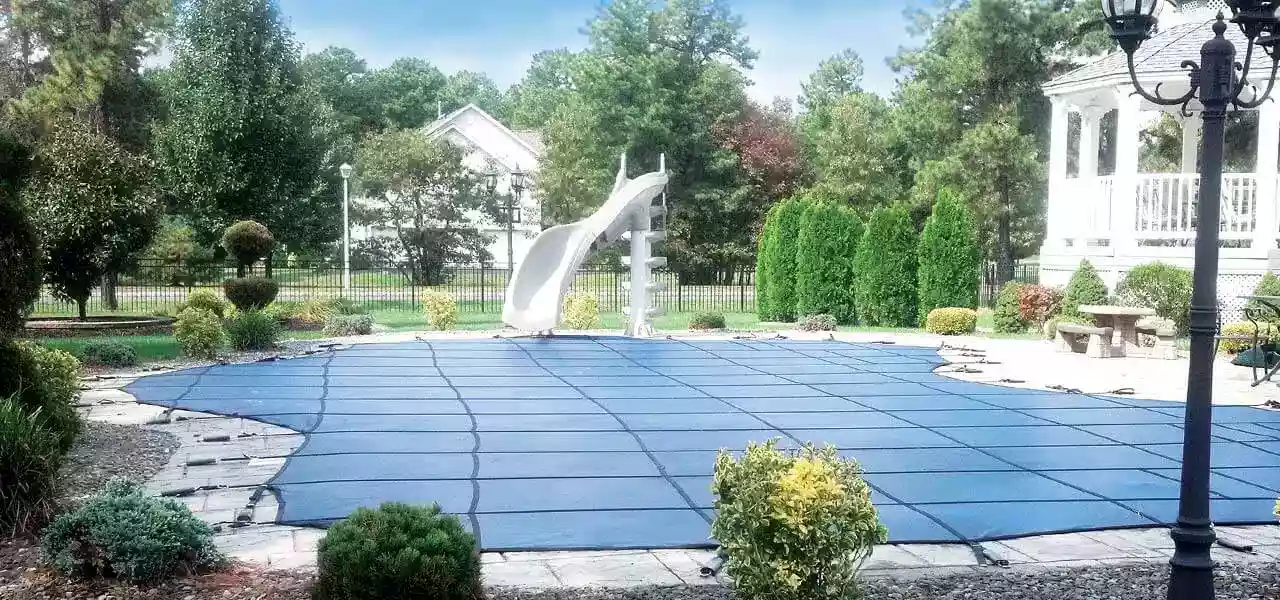
Hack #6: Adjusting the Fit of a Safety Cover

To get the best fit and performance from your safety cover, you want to have equal tension on all of the springs. But, you also want good overlap all the way around the pool, and you don’t want wrinkling or buckling of the fabric and the seams of each panel should be running fairly straight.
After several winters, mesh cover fibers can shrink and stretch, making a mid-life strap tightening necessary, mostly to avoid too much deflection in the center, and to keep leaves from blowing underneath the cover. Adjust your springs equally, so they are all 1/3 to 1/2 compressed.
Hack #7: Cleaning a Safety Pool Cover

One of the best things about safety covers is that very little cleaning is needed, and the nature of the polypropylene fabric is that very little dirt will stick to the material. However, if you wanted to clean your safety cover, it’s easy to do.
Leaf blowers are my preferred method for cleaning a safety pool cover. After detaching all of the springs, run the blower around the pool cover edge, to clean what you can reach. Then while folding the cover, clean two sections at a time, just before making a fold.
You can also use a garden hose with nozzle to spray any dirt, pollen or leaves from two panel sections of the cover, just before folding. Avoid using a pressure washer, which may separate the fibers if used too closely or forcefully.
Hack #8: Storing a Safety Pool Cover

When storing your safety cover, the worst thing you can do is toss it in the back of the shed, or a corner of the garage. This is because rodents can set-up a winter home inside of the cover pleats, chewing holes through many consecutive cover panels.
If you must store it outside, use moth balls or mint sachets to deter mice from nesting inside the cover. If you can, store your cover inside the house, otherwise the safest place may be laying upon some 2×4’s running across the roof rafters in your garage.
Hack #9: Protecting a Safety Pool Cover

I have mentioned above some ways to protect the pool cover off-season, while in storage, but what about while the cover is on the pool? As mentioned in an earlier post, there are 7 enemies of safety pool covers.
These include fire or fireworks, which can quickly melt holes in your safety cover. Keep your cover clean, to deter deer and other large animals from walking across the cover, and take a look up – and trim any large, overhanging tree branches.
Hack #10: Patching a Safety Pool Cover

Fire, deer, tree branches – they can all poke holes in your safety cover. To keep holes from spreading larger, and to keep out sun and debris, it is best to patch any holes large enough to put your finger through.
For panel or strap replacements, call our custom cover department, for a quote on cover repair. Smaller holes can be patched with safety cover patches.
Hack #11: Folding a Safety Pool Cover

If you have been rolling the cover, or folding into quadrants you are doing it wrong. 🙂 The best way to fold a safety cover is to ‘Fan-Fold’ it, also known as ‘Accordion Style’. This method is not only easier for folding, but makes covering the pool much easier as well.
After removing springs and putting down the anchors, pull the cover onto the shallow end deck about 5-10 ft. (or whichever side you have the most room to work). Place your leading foot on the cover seam, while pulling the strap on the next seam, to bring the cover over your foot. Continue seam to seam, until the cover is fully removed. Then fold, fold and roll the cover, to stuff it in the cover bag.
Hack #12: Replacing a Safety Pool Cover

When it comes time to replacing your pool cover, you’ll want to be able to re-order the same cover, so that it fits the existing anchors, making your cover replacement job easier.
Keep your original paperwork and invoice from the manufacturer, as calling up the invoice number is the easiest way to fabricate an exact duplicate cover. If your cover is a ‘stock cover’ of a common size, also retain some information to know which cover manufacturer made your cover, as panel sizes vary by maker.
If none of this information is known, you can A-B measure the pool, and also measure to each existing anchor. In this way, the new cover can be fabricated to match up to the existing anchors.
Hack #14: 12″ Allen Wrench Drill Bit Extension
If you’ve ever scraped your knuckles against the hard concrete patio while dealing with a safety cover anchor, this hack is for you. Buy a 1/4″ x 12″ long drill adapters, or use a hacksaw to cut off the bend of the standard safety cover hex key.
Of course, you need to have to have pretty clean anchors that move up and down easily, or your drill (or mine anyway) will bind up. I put in new cover anchors to replace the sticky ones, and can now just use my cordless drill. 🙂
Hack #14: Mark the Corners of Your Cover

It can be confusing and cumbersome to unfold really large safety covers in the cramped space of your pool deck. Even rectangle safety covers only fit one way, as strap lengths and panel widths are different.
What I do is mark a corner with a colored zip tie, and use finger nail polish to paint the matching brass anchor. You can also use spray paint, on both spring and anchor, to give your cover a real sense of direction.
Hack #15: Use the Grid as your Guide
The seams of a safety cover act as a grid to help you determine if you are lined-up with the opposite side’s tension spring. This is really helpful for odd-shaped pools where it can be difficult to determine which spring attaches to which anchor.
To think you have your safety cover on correctly, only to find that you have to go back and undo every spring and slide the safety cover over 2 feet, is avoidable – use the grid.
Hack #16: Seal Up Gaps

If your cover does not fit exactly tight against the concrete, dirt and leaves can blow in, causing stains and using-up your winter chemicals. Same thing if you have a raised wall, obstructions or steps that the cover interfaces with.
Use pool noodles, inexpensive inflatable rafts, or larger foam pieces to fill gaps against a raised wall. Use water bags to hold a cover flat on pools with bullnose coping that raises cover edge or flagstone coping that lets leaves blow right under.


Hi,
Is there coating you can spray on the solid cover. Mine is about 10 years old and i protect the edges with old vinyl from an old liner. I’ve noticed its a little more stiff than new. Maybe armor all or something?
Hi Sebastian, we don’t have any cover conditioners. Not sure they make such a thing for PP or PE films. The best thing may be like a spray-on laminate, some type of protective coating, but I’m not sure what that would be.
Thanks Davy for the reply. I’d like to ask one more question. The reason my cya got up to 110 was due to my effort to control my pH and alkalinity. My understanding is acid is the only manner in which to lower them. Besides muriatic acid I switched to the commercially available granular pH decreaser. In any case, how can I correct pH without increasing cya? Thanks again.
Hi Glenn, sounds like you may have added cyanuric acid to lower pH or alkalinity? CYA has no effect on either. pH decreaser (sodium bisulfate) or alkalinity increaser (sodium bicarbonate), do not contain cyanuric acid.