Today’s pool testing guide covers the finer details of backyard water analysis, and a few common pitfalls of using an outdoor laboratory. Pool water testing can become so routine that simple mistakes could make your test results inaccurate. There are 12 pitfalls to avoid when testing your pool or spa water.
1. Water Sample From the Wrong Area of the Pool
Where you gather your water sample from in a swimming pool matters. Avoid areas near return lines, steps, ladders and corners of the pool. These are locations in a pool where the pool chemistry is going to be different from the pool as a whole.
In order to get an accurate sample of your pool water, don’t draw the water from the surface because that is where the highest concentration of pollutants like oils and debris gather. The surface is also where evaporation is taking place and the interaction with the air can throw your results off. As a rule of thumb, an elbow deep depth between the shallow and deep ends of the pool is the sweet spot.
2. Not Testing the Sample Immediately
You pulled the sample from the perfect area and depth of the pool but didn’t test it right away. Life is full distractions – letting a sample sit too long gives it time to react with the air, sunlight, and even humidity. Commit to the process!
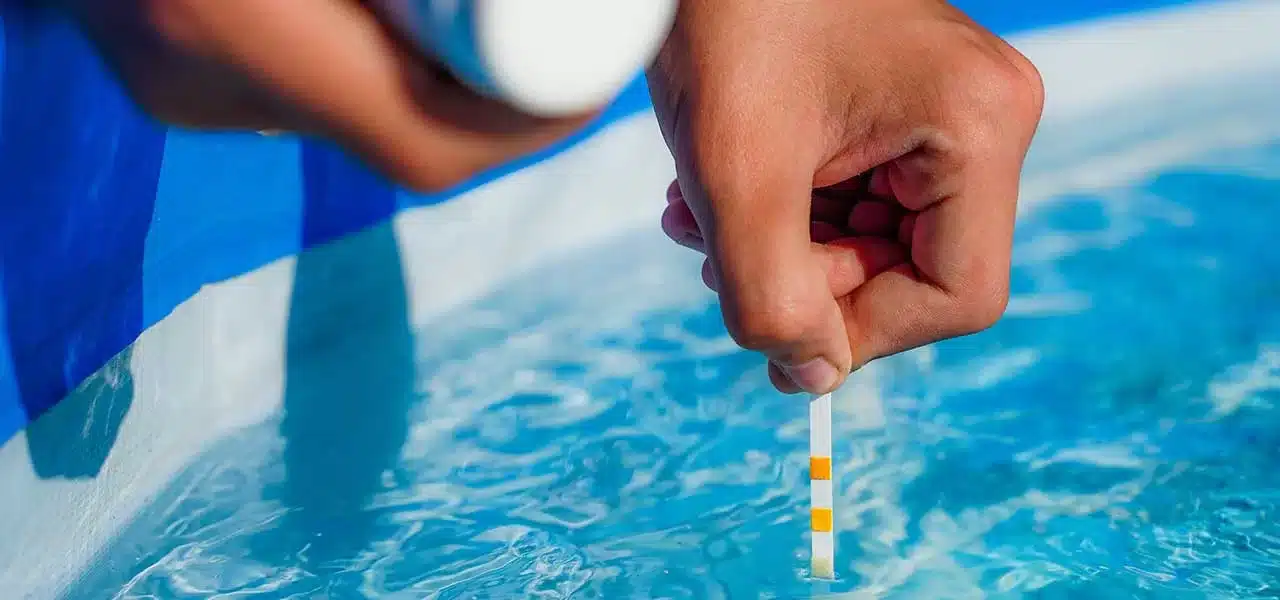
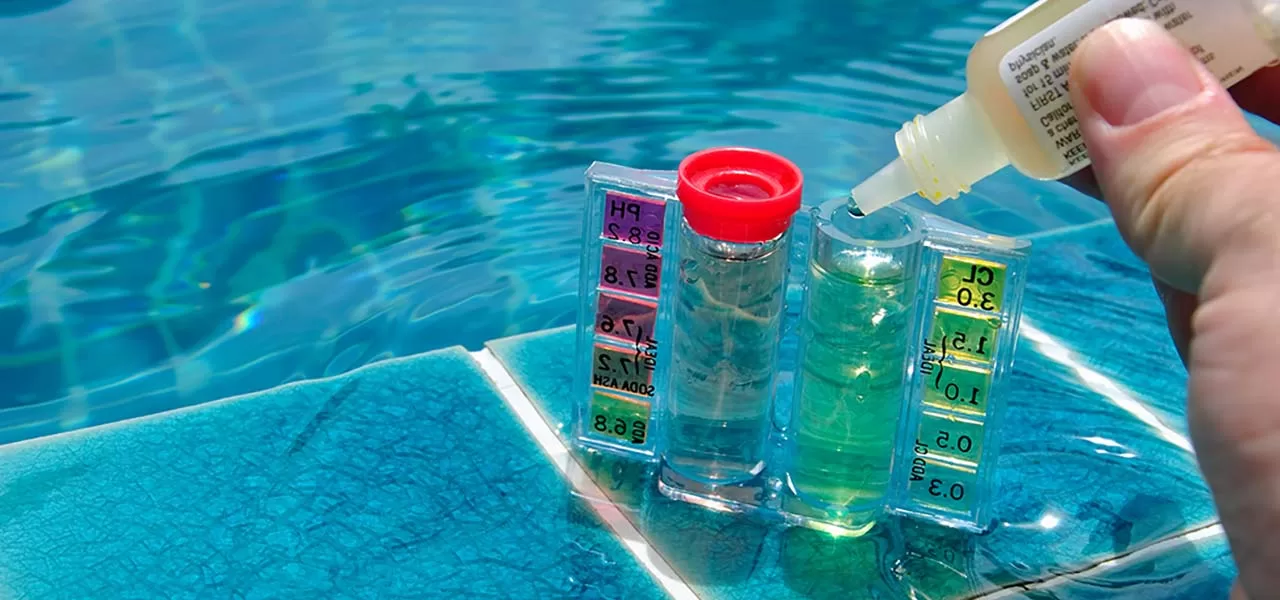
3. Tilting the Reagent Dropper
This is one of the small details that can make a big impact on the accuracy of your test results. Tilting a reagent bottle as shown, instead of holding it straight up and down will make the drop smaller and throw everything off. If your test kit includes tablets, remember to crush them fine. Just like drops, cutting corners on this step will ruin the chemical reaction. Speaking of proper measurements…
4. Too Light or Too Much Water Sample
Even the slightest inaccuracy of a water sample can skew your test results. It may only be a few dozen drops of water, but too little or too much can tip the scales. Precision is key when it comes to achieving the best results possible. Hold your test vial at eye level and the bottom of the meniscus or curve of the water should be lined-up with the “Fill” level line.
5. Not Swirling the Sample
You followed steps 1-4 perfectly, and added the perfect amount of reagent into the perfect amount of water and in all the excitement, didn’t swirl between drops. Take your time and mix the reagents thoroughly. Holding the comparator on the top between your thumb and forefinger, and rotate your wrist to swirl the sample within the test vial.
For the titration tests (FAS-DPD, pH demand, Alkalinity & Calcium), if you are unsure if the sample color has changed completely, add another drop. If you do not see a change, just subtract that drop from your count. Or when the color changes color briefly, and one more drop changes it completely, you can count the last drop as 5 ppm, instead of the normal 10 ppm.
6. Expired Test Reagents
Poring over every detail during the testing process could all be in vain if your pool water test chemicals were compromised before you even pulled your first water sample. It’s best to begin each season with fresh reagents. Typically, the chemicals used in test kits are considered to have a shelf life of about a year.
7. Improperly Stored Reagents
The best test kit money can buy can be rendered useless due to improper storage. The shelf life of pool test chemicals can be greatly impacted by hot and cold temps. Ideal storage temperatures are between 5° to 22°C (40° to 70°F). Bear in mind, that a constant fluctuation of temperature can also negatively impact the chemicals. Store pool test kits in a cool, dark place, and avoid prolonged exposure to the sun.
- Frozen Test Reagents: Water test kit makers suspend shipments of liquid test kit chemicals during freezing weather, however water test chemicals may still be viable after freezing for a short time period. Allow frozen reagents to thaw at room temperature. If the bottle has cracked or if there are crystals around the tip, or particles floating in the bottle after shaking, you should replace the reagent.
- Clear Reagents Turning Colors: Taylor reagents 1, 2, 3, 5, 6, 7, 9, 10 and 12 should be colorless and clear. Drop a few drops onto a flat part of the testing vial; if the drops look cloudy, have floating ‘globs’, or are any color other than clear transparent, you should replace the reagent.
- Colored Reagents Changing Colors: Taylor reagents 4, 8 and 11 are colored indicator solutions. Reagent 4 or pH Indicator is red, while reagent 8 or Total Alkalinity Indicator is green and Calcium reagent 11 is a blue color. If another color, you should replace the reagent.
- Colored Reagents Staining Bottle: Taylor reagents 4, 8 and 11 should not stain the bottle in which they are contained, which indicates a separation of the test pigment. If the reagent bottle is stained, you should replace the reagent.
8. Cracked or Faded Comparator Vials
Similar to reagents, a cracked test vial or comparator can lead to pollutants spoiling your results. Even a faded or slightly scratched test vial can open the door to particulates that have no business getting mixed up with your perfectly swirled reagents. If the test vial or optical chamber looks old, faded or perhaps slightly stained—it’s time for a new test vial.
9. Using Test Reagents from a Different Test Kit
You can’t mix and match test kit reagent chemicals; this isn’t a matter of brand loyalty. Pool test kits vary by manufacturer and even the slightest variation of pool test chemicals strength and dropper orifice size can (everyone in unison) Render-Your-Test-Results-Inaccurate. Where have we heard that before? While we are on the topic of mixing and matching…
10. Mixing Test Reagent Bottle Caps
When you are done with a pool test chemical it is important to put the cap back on immediately. Not only does this help protect it from reacting with environmental variables it can prevent putting the wrong cap on the wrong bottle. Even if both caps are the same color (more reason not to delay), the chemicals under the caps are certainly not and a little bit of residue is enough to unravel the fabric of the universe – or at the very least, cross contaminate your reagents and you know that is a gateway to trouble.
11. A Dirty Test Kit
Don’t touch the tip of the dropper bottles with your fingers. Exposure to these chemicals could irritate your skin and also the oils from your fingers can contaminate the drops. In addition to a clean reagent dropper bottle, thoroughly rinse out the test vials or optical chambers after testing. Lingering chemicals from a previous test is a surefire way to ruin your next test.
12. Misreading the Color Chart
As cool as you look in your sunglasses, take them off when reading discerning the hues on the optical chamber. Perhaps this is obvious, the tint of your sunglasses can make 7.5 look like 7.6 on the color scale.
Hand-in-hand with removing your sunglasses is making sure you are not holding the optical chamber up to an artificial light source, or anything other than a white background (the purpose of the white rectangle, found in some test kits). A blue sky or blue water background can lead to a green pool when you misread test results.
pH Testing Problems
1. Very High Chlorine levels (20 ppm+) can turn your pH sample test a variety of colors in the red/purple spectrum. You can however, add a few (1 – 3) drops of Taylor reagent #7, sodium thiosufate to the water, to remove the chlorine from the sample before adding the pH indicator or phenol red solution. You may still however obtain an inaccurate pH test, until the chlorine level is below 10 ppm.
2. Very Low Alkalinity levels (-50 ppm) can cause falsely higher pH test results, due to the relative pH level of the pH indicator solution, which is about 7.5. In a pool with low alkalinity levels, the pH of the test sample may change rapidly or “bounce” upwards, because of the addition of just 5 drops of the pH reagent, with a pH level of 7.5. This can raise your pH test result.
3. Out of Range Testing. Testing at the upper or lower limits of the test range can produce false test results. Between 7.0 and 8.0, you can discern the small changes and accurately test within that range. Below 7.0 and above 8.0 however, the test colors do not change reliably, and what may look like 9.0 is actually 8.4, or what appears as 6.6 is actually 5.8, for example. Make small additions or adjustments with pool pH chemicals, when pH is outside of the 7.0 – 8.0 range, to avoid overshooting the mark.
Total Alkalinity Testing Problems
1. Very High Chlorine levels, like after shocking the pool or spa, can produce a yellow or clear endpoint, instead of turning from green to red, like normal. As above, you can add 1-3 drops of Taylor reagent #7 (included in the kits I mentioned above), to remove the chlorine from the sample before testing for alkalinity levels.
2. Cyanuric Acid Contribution – when performing a test for Total Alkalinity, the result includes carbonates, bicarbonates and also cyanuric acid. If you have any amount of cyanuric acid (chlorine stabilizer) in the water, it will add to your total alkalinity readings and produce false high test results. To compensate for the contribution, you should deduct about 1/3 of your cyanuric acid level, from your total alkalinity test. For example, if your cyanuric test shows a level of 60 ppm of cya, deduct 20 ppm from your total alkalinity test reading.
3. Very High Algaecide levels – quaternary ammonium algaecides (which is most pool algaecides), in very high concentrations in the pool can affect the alkalinity test, producing false low readings. Biguanides like Baquacil or Aqua Silk can also produce similar low alkalinity results, when levels are abnormally high.
False Chloring Test Readings
1. High Chlorine levels, once again, high chlorine levels may be so high that the test sample “bleaches out” or turns a cloudy-clear color, after adding the reagents and swirling. In my low-range (0.25 – 2.5 ppm) K-2105 DPD test kit mentioned above, I can bleach out the test sample at less than 10 ppm, but the high-range K-2005 kit, which tests from 0.5-5.0 ppm, will go twice as high before the sample bleaches out. The problem is that high chlorine levels which don’t bleach out completely, will produce false low chlorine results. To measure very high chlorine, you can dilute the sample by filling the test vial half full of pool water, and half full of bottled water, and then double the test result.
2. Combined Chlorine levels, will begin to raise the Free Chlorine test result within 30 seconds. DPD test kits use 3 bottles to test for Free, Total and the difference between the two is combine chlorine, aka chloramines. After adding DPD #1 and DPD #2, take your test reading within 30 seconds, before the inhibitors stop working on the chloramines. Add #3 reagent also within 30 seconds, and if the sample turns noticeably darker, you have a measureable amount of combined chlorine in the pool. Rinse your DPD test vial completely after testing for free and total chlorine, any traces of DPD #3 reagent left can falsely raise chlorine test results.
3. Non-Chlorine Shock, in high levels can affect a chlorine test, producing false high readings. If you have recently shocked the pool with MPS (monopersulfate), usually labeled “Oxy” – something, it can end up in the chlorine test too, and contribute to the chlorine test result, giving falsely higher total chlorine readings.
If there is one key aspect of pool maintenance where spending more will ultimately save you money in the long run, it’s using a high quality test kit from a reputable manufacturer. Cut corners in this area and you could end up spending more on chemicals attempting to restore water balance and fight water problems.
I highly recommend the Taylor K-2005 test kit (and K-2006), and the ColorQ Pro7 by LaMotte, and greatly prefer the accuracy of liquid test kits over the convenience of test strips because, in pool chemistry, accuracy is king!


I have repeated the test several times and got the same thing. I just got the kit this January 2020. I got 160 the previous day then the ff day did not get any after increasing the Bromine. Do I just add more calcium in that case?
Naah, 160 ppm is OK, calcium is very slow to change, the slowest of all of the tests, does not fluctuate much, or rapidly – it’s probably still 160…
Hello Dr Pool,
I need help with our 2500 gal spa (indoor)
Just replaced the water.
The calcium hardness test did not turn red.
Alkalinity -80 ppm
Ph is 7.4
Bromine is 5
I dont know how much calcium I should put in
Pls Help! Thanks
Hi Nicole, if you are asking about the Taylor Calcium Test, you first add 20 drops of reagent 10, then 5 drops of reagent 11, which turns the sample red, and then count the drops of reagent 12, until the sample turns blue. If the sample did not turn red with reagent 11, it could be very, very high chlorine bleaching out the indicator solution, or the reagent 11 has gone bad.
Hi…
I’m testing my PH and initially it reads 7.5…however as time goes by it gradually gets darker…five min later my PH is 8.2. Is this a common thing? Are my initial results accurate?
hi Susan, that can be common, with strong light or sun, it will change the color of the sample. Chlorine tests will often do the opposite, becoming lighter.
When testing chlorine at my job we use a reagent that turns a golden yellow for high chlorine. On a spa we service the test come out what seems to be an orageish rid color, i let it settle cause past few weeks we didnt add any chlorine. And when it settled it was the normal color at about a 1.5 ( perfect) but red floating things in the top, test kit works fine on the pool, only get this result with the spa ( they arent connected)
Hi Kendell, when OTO reagents produce an orange color, the free chlorine level is usually 10-20 ppm, and when red, 20-30 ppm or higher. And, chlorine test samples will fade in color over time. Not sure about the floating bits in the sample however. Seems odd that you have not added chlorine (maybe someone else is?). Turn on the jets to aerate and that will help bring the level down somewhat, along with sunshine, and time. Sodium Thiosulfate can be used to remove chlorine. DPD is a better test for chlorine, if you are servicing pools and spas, you should switch from OTO, to allow for testing for Total Chlorine and Combined.
Dr. Pool,
Maybe this is a new one for you? With a Taylor/Leslie’s test kit, if I invert (just once) after adding the 5 drops of reagent #1 (yellow bottle) before putting in 5 drops of reagent #2 (brown bottle), the reading comes out lower than if I didn’t do the inversion. E.g., reading 1 with inversion and reading 2 without the inversion. I can consistently reproduce this. Is this known? Which should I do, invert or not? Thanks, Steve E
Hi Steven, are you capping with the cap, or with your hands? I wonder if any contamination is instantly using some of the chlorine, and producing a lower reading? I don’t know of any other explanation, to explain a difference in test results between swirling and inverting the test sample to mix.
PH is very low & when Testing Alkalinity the test did not turn GREEN first. After first 2 drops of 007 & 5 drops of 008 the test tube turned RED without any drops of 009. This means I need to add baking soda right?
Hi, yes if it turns red immediately, after adding R-0008, then you would have close to zero alkalinity, which is rare, and your pH is likely, as you say, also very low. Add Baking Soda, sodium bicarbonate, alkalinity increaser, add ten lbs, per 10,000 gallons, in small batches of 3-5 lbs each, then half hour later, another 3-5 lbs… circulate and re-test
It seems the longer I leave a sample in the PH test kit, it climbs up the PH scale. Should I take the reading immediately or let it sit for a few minutes in bottle kit and then read it? It started off with a 7.2 but now looks purple above 8.2
Hi Roger, the immediate test is the one. High chlorine levels may be giving you this issue.
Thanks, I had the same doubt and found your website with the answer 😀
[…] Improper pool testing practices can lead to a domino effect of unbalanced water and algae, and a pool chemical spending spree to restore well-balanced pool chemistry. Spending $80 on a test kit can directly lead to saving hundreds on pool chemicals. It’s pool ownership 101 but it’s a lesson that is time tested. […]
New at this. Pool is a 25 x 4. I figure 32,000 to 33,000 gal?
Chlorine is 0
I’ve added 9 gallons bleach over 3 weeks and have shocked weekly.
Ph is 7.8 maybe a little higher
Alkalinity is 80
Total hardness is 200
CYA is 0. Added 2 pounds of stabilizer yesterday and 3 clorine tabs. Same readings today. Going to add another 2 pounds of stabilizer today.
Pool is above gound
Hi, drop the pH down to 7.2, and the chlorine will be twice as active (and powerful). You should begin to see the effect of the stabilizer right away. With a lower pH and stabilizer level, you should begin to test a chlorine level, If not – shock one more time with 5-6 lbs of cal hypo.