Perhaps you have a Texas-sized estate with acres of flat land to install a new above ground pool. For most folks, however, the available space for installing a new swimming pool is limited, especially given the many variables below.
5 Things to Consider Before Buying a New Above Ground Pool
First things first! Contact your town officials responsible for building codes to be sure you do everything legally. This is something that is taken care of at a local level and is different for all of us. Ask about above ground pool fencing regulations, as well. Most towns have some sort of pool fencing ordinance.
1. Water and Electric
Ready access to water and electric are nice to have close at hand. For most pools, it’s best to run underground conduit from a house outlet to the pump and filter location. You may also want to add other electrical items to your pool, such as a pool light or robotic pool cleaner, and you don’t want electrical cords stretched across the lawn.
Dragging the garden hose to add water or clean your above ground pool is manageable if it’s under 50 feet. But longer runs may lead you to extend an underground water pipe, tapped off of a nearby water spigot or sprinkler system.
2. Visibility from the House
We want to be able to enjoy the view of the pool from as many angles of the house as possible, and not only from an aesthetic point of view. Pool safety lessons promote the idea of being able to keep a watchful eye on the pool. Safer locations exclude any partial obstructions or blind spots when viewed from the house.
3. Level Land for Installation
The earth beneath your pool will need to be absolutely level before you begin to assemble your above ground pool. This is extremely important to the structural integrity of your pool. Lopsided pools tend to fall over and end up in an episode of America’s Funniest Home Videos! Don’t be that guy. Instead, look for a relatively flat area to begin with. This will make your above ground pool site prep a bit easier.
4. Access to Your Pool
You want to be able to get to the pool fast on a hot day! Or back into the house fast on a cold night. Also consider access by emergency personnel, God forbid. And what about preventing access to unwelcome neighbors or passers-by? I remember some kids (not me!) who would climb up onto the roof of our house, to jump off into the pool. Cheap thrills, but we’re lucky no one got hurt!
All pools should be fenced, but not in a way that someone could easily climb the fence and jump in. Also, your local government likely has setback requirements that would prevent any structure from being too close to the property line. A setback of 10 ft. from the side and 20 ft. from the rear of the property is not uncommon, but check your local .gov website to be sure.
Keep a buffer zone around the perimeter of the pool when you plan for its location. You will find it easier to maintain the pool if you can easily walk all the way around it.
If your budget allows for a complete surrounding pool fence and deck, these make the best above ground pools, in my mind. If not, you will be looking at A-frame ladders to enter and exit the pool. Make sure to get one that has a locking feature, to prevent unsafe use of the swimming pool.
5. Sun or Shade
Finally, you’ll want to consider the amount of sun or shade that your pool will receive. You may wish to have partial shade, but large deciduous trees near the pool will require more pool cleaning work. Too much sun can make the pool too hot during certain times of the year, and will use up more chlorine than a shady pool. If your location allows it, some mix of sun and shade may be nice. You make the choice.
Once you determine the best location for the pool, you are in a better position to choose size and shape. Oval or round? Large or small? These are the fun decisions, along with the fun pool toys and pool floats that you’ll soon be able to buy!
Preparing the Location for Your New Above Ground Pool
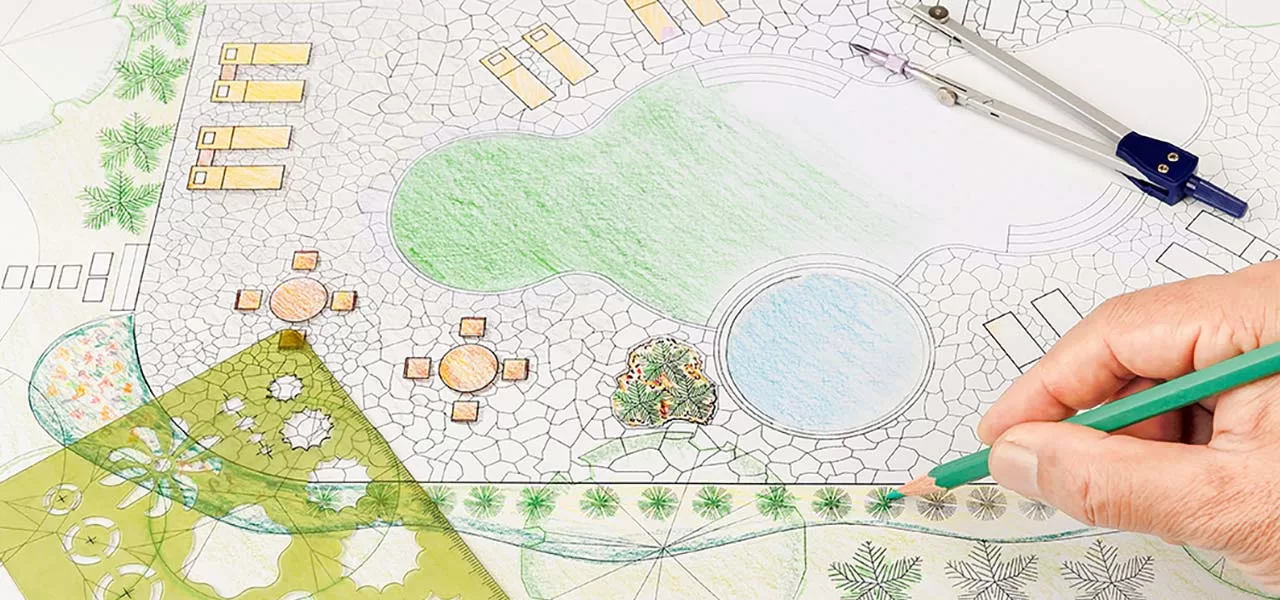
The next step in getting ready for your new above ground pool is to find the perfect location for it.
Measure the area
Let’s say your new pool is a 24 ft. round pool and we will proceed under that assumption. Find the center of your new pool and tamp a stake or piece of rebar into the ground. Put your tape measure on top of the stake, and measure out 13 ft. – from the center point. I say 13 ft., to make the circle 26 ft. – instead of 24 ft. – to give us room to work around the outside.
Mark the area
In this extra foot around the pool you can put decorative stones, plants or mulch after building the pool to avoid grasses and weeds growing up against the pool wall. Using the measuring tape or a string like a compass attached to your center stake, walk slowly around the perimeter and mark the area with lime or spray paint in the grass/soil. You’ll be marking the outline of the pool, as well as the 12″ perimeter space outside of the pool footprint.
Remove turf
Now we want to remove all the grass and loam inside the circle that you made. If you have the availability of using a bobcat or bucket loader; that would be the easiest way to remove it. But picks and shovels work fine too. You will end up with a big pile of dirty grass waste, that you can hopefully wheelbarrow to someplace close. It may be more cost effective to have an excavation company or local “Bob & his Bobcat” to come by to do the job, especially if you are planning to use one of our above ground pools suitable for buried placement. “Bob” will usually be able to carry away the fill dirt.
Get sand
For the smoothest floor, and to protect the liner, you will need a load of sand for the floor of your new pool. If you hire “Bob,” he may be able to deliver it or have it delivered. Or you can order it from a sand and gravel vendor near your home. Some yards even have online ordering available.
For our 24 ft. round pool example, we’d order about a yard of masonry grade sand. For other pool sizes, order enough sand to cover your pool diameter in 1″-2″ of sand. We don’t want any small pebbles or pea gravel in the sand, which could cause damage to the liner. So be sure that it’s masonry sand or polymeric sand that you’re ordering. You don’t want coarse “construction sand.”
For a delivery fee of $50 or so, they’ll come deliver the sand to your driveway, or other convenient location. Place a tarp on the area for them to dump on, and use a wheelbarrow to take it back to the pool area. Stone dust, aka crush-n-run, also makes a fine pool base to cover the earth. Remember that this layer should not be used as fill – the earth beneath the thin layer of sand, stone dust, vermiculite or concrete must first be level before placement.
Check local fencing laws
Another thing to consider is that in most areas of the country, if your pool is less than 4 ft. tall, you will need a pool safety fence around it. If the pool is partially buried, so that the top of the wall is less than 48″ from the ground, a safety fence will be required. Even when your wall is 48″ high, there are conditions, such as a deck connected off the house that comes up to the pool, where a safety fence may be needed.
Most people, however, install their new above ground pool on flat ground after replacing about 1″-2″ of grass and soil with sand. For these folks, an A-frame step or ladder combo with safety feature will allow access, but will also help to keep the pool safe.
Leveling the Ground for an Above Ground Pool
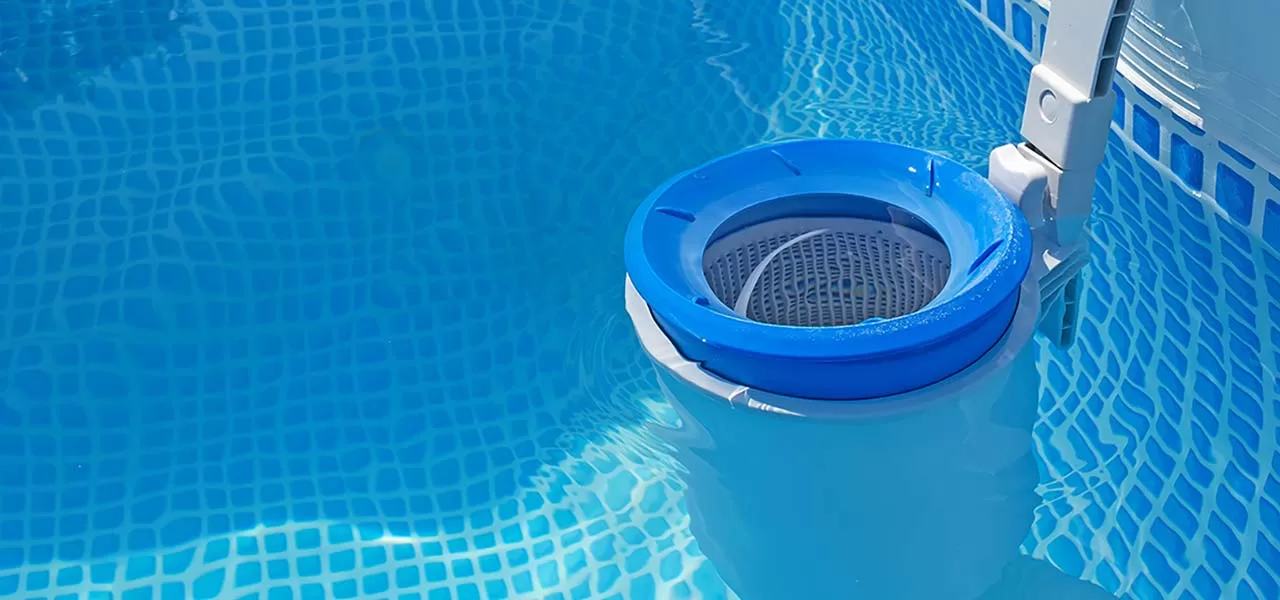
I can’t overemphasize how important it is to have a level pool. An uneven pool will not only get you teased by everyone who notices it, but it also puts unnecessary stress on the side that gets the extra weight. It also makes it harder to keep the precise level in the pool for the skimmer to work properly, and could result in winter pool damage.
While digging out the grass, you should begin to do any leveling work that is required. Even though it may look level, it may not be. This step is very important to ensure that your new above ground pool won’t be lopsided. A laser level or a transit is the easiest and most accurate way to accomplish this. But if you don’t have that available, a couple of stakes, a ball of twine and a line level will do the trick just as well. Here’s how to use string to check level.
Stakes and strings
Run the twine or string tightly between the stakes on either side of the perimeter at ground level, but not touching the ground. Adjust the depth of the stakes until a carpenter’s level, placed on the tight string, shows you that the string is level. You may find it easier to run 6 or 8 strings across, after you get the grass removed, or you can remove the stakes and reposition it as you work around the pool, leveling pizza slice segments, just under the string.
Getting level ground
Another trick to ensure level, is to place the carpenter’s level onto an 8 ft length of 2×4, and move it in a concentric circle pattern. Keep one end on the pool center, as you check level in each place. It doesn’t need to be perfect if you are adding a layer of masonry sand after leveling, but it should be as close as possible.
Paver placement
During installation of your new above ground pool, you will also level blocks underneath each upright, which is another time when a transit comes in handy. But if you can’t borrow or rent one, use 2x4s, stakes, string and a long level.
Bring in the sand
When the digging and leveling of the area is complete, have your sand brought into the center of the pool area and leave it in a pile, do not spread it out at this point, you will find it much easier to install the pool wall on a hard bottom rather than in the sand. Which brings me to another point.
Getting level pavers
The level of the blocks and the bottom rail must be very precise so that the wall has firm ground to sit on. Before you begin to install the pool wall into the bottom track, make sure the track or bottom rail is level all the way around and from side to side. Also check that it is sitting completely flush on the ground and not suspended above the ground. Use stakes and strings or a laser level to be sure that all pavers are at the same height, relative to each other.
New Above Ground Pool Accessories
As we are a one stop shop for above ground pools, you will not be disappointed in our selection of products to support and embellish your above ground pool installation experience. The most important part of the pool can be said to be the vinyl liner, because without it, water just spits out of the cracks. Our pool liners come in all sorts of shapes, sizes, and patterns and can provide 10 to 15 years of quality use.
Wall Foam
To protect the vinyl liner, consider using pool cove, wall foam, and floor pad during installation. Pool cove snaps into your pool’s wall track and keeps the liner from over-stretching at the seam that runs the perimeter of the pool. It also protects the liner from sharp or rusty surfaces, and makes a nice floor to wall transition.
Wall foam is a smart investment that protects the liner and makes the pool walls more comfortable, warmer, and reduces heat loss. Floor pads protect the liner from any objects that may move up through the ground during the winter, and helps prevent heel divots or footprints from forming.
Solar and Water Chemistry
For the comfort and safety of your pool users, consider solar blankets, steps or ladders and pool lights, to name a few. Solar blankets are super investments to keep your pool water warm through the cooler nights so those morning dips do not have to be so eye-opening! Solar heaters are also very popular add-ons for above ground pools.
To manage the water chemistry, you’ll need a test kit or test strips. For sanitation and to dispense the chlorine tablets, you will use tablet feeders, such as a floating chlorinator or an in-line chlorinator. A nice pool pole, leaf rake and brush are all cleaning tools that you will need on a regular basis. And finally, when the water is clean and clear, you’ll want to relax in your pool with a nice pool float and maybe some pool toys for the kids.