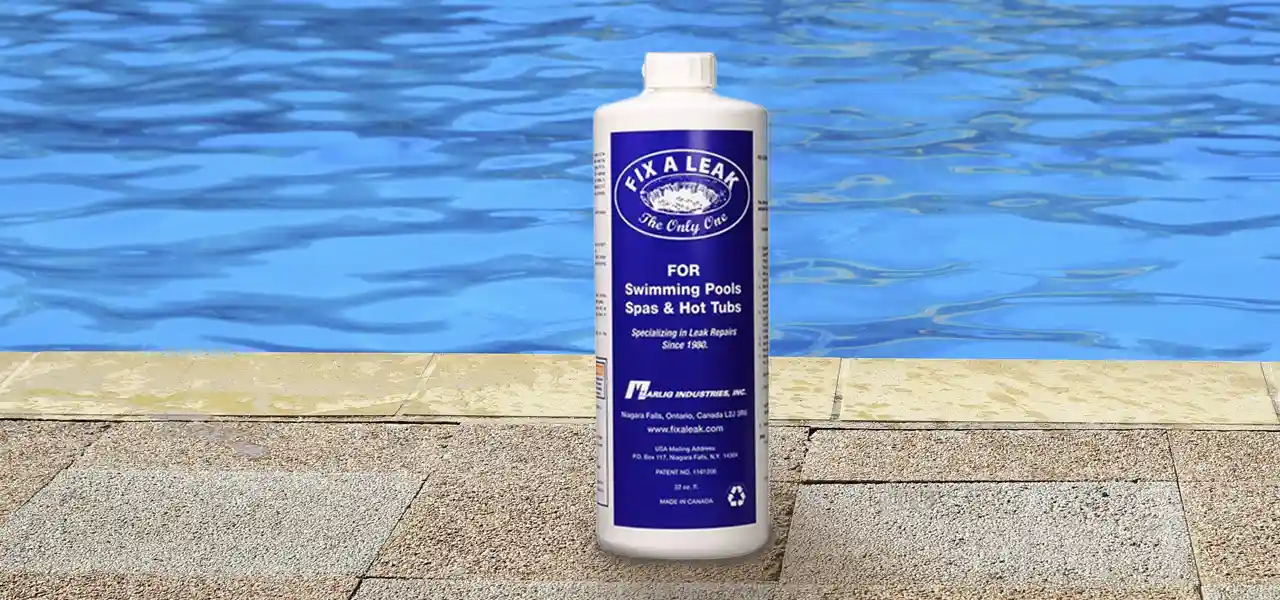
Fix-A-Leak is an emulsion product that acts like platelets and plasma that forms a blood clot over skin cuts. Microscopic layers of sodium silicate pile on top of each other to form a clot, and seal up small holes, cracks and voids, up to 1/8″ wide. Does it work to fix pool leaks? Not every time, but yes, it can form a semi-permanent repair when applied correctly. The correct process depends on what you are trying to fix with Fix-A-Leak, but it is a detailed procedure that really should be a last resort.
How Fix-A-Leak Works
In other words, Fix-A-Leak should be employed only after extensive testing to find a pool leak, or to isolate the pool leak to a particular plumbing line, such as a skimmer, drain or return line. The best repair is of course to pinpoint the leak to an exact location using a leak detection expert, and then dig it up and replace the broken PVC pipe or fittings. Or to find the leak in the pool shell or gasketing and make a proper patch inside the pool. However, the best repair at the moment may be using Fix-A-Leak.
Fix-A-Leak is suited for many types of small leaks on hot tubs or spas, but it does require process and procedure. You don’t just pour it in the pool and walk away. I spoke with the people from Marlig at a recent pool trade show event, and they impressed on me how important the process is, to correctly use Fix-A-Leak or Stop Leak in a pool or spa.
Pools with Small Voids or Widespread Cracking
There are situations where a vinyl liner can suffer track or golf cleats, or small slits from a skateboard or other non-pool toys. If you can patch it with a vinyl repair sealant, that is the best route to take, but if there are many very small holes (not tears, rips or large holes), you can expect some level of success with Fix-A-Leak treatment. For gunite or fiberglass pools that have small, slow leaks, or seepers and weepers that have eluded your best leak detection efforts, you can also try the Fix-A-Leak “Shotgun” technique, and put enough of it (1 Qt per 20,000 Gallons), to hopefully plug the leak, or at least slow it somewhat.
How to Repair Cracks with Fix-A-Leak
- Bypass the Filter. Fix-A-Leak will clog your filter fast. Set the Multiport valve to Recirculate, or for Push-Pull slide valves and Cartridge filters, remove the DE grids or filter sand, and reassemble the tank together tightly without the filter media. Be sure your chlorine level is on the high side, as you won’t be filtering for a few days.
- Soak Fix-A-Leak in a bucket of warm water for ten minutes. Then shake well for 30 seconds to mix the contents well.
- With pump running, add Fix-A-Leak directly to the skimmer or in front of any suction outlet. Add 1 Qt (32 oz) per 20,000 gallons of pool water.
- Adjust suction valves after all Fix-A-Leak has been sucked into the pump. Close the skimmers most of the way, and open the main drain valve fully. Fix-A-Leak is heavy and particles will sink to the lowest point of the pool, so adjust valves to pull mainly from the main drain, or set up a pool vacuum hose and head, and leave it in the deepest part of the pool. Use your pool brush or pool cleaner (without a bag) to stir up settled Fix-A-Leak.
- Continue to Run the Pump for 8-10 hours. Then shut off pump for 48-72 hours, brushing 3-4x per day to stir up the emulsion and provide some water circulation. Add water if needed to maintain water level, and do not use the pool during treatment.
- Vacuum pool to waste, to remove settled silicate material. Return filter to operation and shock pool to raise chlorine level if needed. If you cannot vacuum to waste, clean DE grids or cartridges fully by removing from tank and hosing clean after vacuuming.
Cracks or voids around wall and floor fittings
Anytime a pipe, drain, skimmer or pool light comes through a wall, there is a potential for leaks. These can be dye tested (with the pump off) to determine if there is a leak. And once again, the best repair may be to chip out the area and pack it full of plaster mix, use an epoxy pool putty, or in the case of a vinyl pool, replace the faceplate and gasket around a leaking wall fitting. However, fix a leak can be directly administered to small underwater leaks around wall and floor fittings, lights and rail sockets, skimmers and returns, using a squeeze bottle.
- Shut down the pump and allow the water to become still.
- Soak Fix-A-Leak in warm water for ten minutes, then shake well for 30 seconds to mix the contents well.
- Transfer Fix-A-Leak to a squeeze ketchup bottle or water bottle, to administer underwater to the crack.
- Slowly squeeze out the emulsion, if it is actually leaking, it will draw Fix-A-Leak into the crack by suction.
- After several treatments, dye test to confirm leak has stopped. Allow 48 hrs before turning on the pump.
Cracks or voids in PVC pipe
When you have isolated your pool leak, through a series of if-then testing, down to one or two particular plumbing lines, you can use Fix-A-Leak to repair cracked pipes or fittings, when damage is not extensive. Again, the best repair would be to isolate the near exact location, using listening devices, and then cut the deck, dig down and repair the pipe, or abandon an old line and connect a new line from the break, back to the equipment pad. However, if you want to use Fix-A-Leak to seal up underground plumbing cracks, it does work when applied using what the manufacturer Marlig refers to as ‘reversing the water flow’.
- Cut the pipe that is leaking at the equipment, at a location that allows you to reconnect easily later, and in a way that you can slip a hose inside of the pipe, which may mean removing a few inches of pipe, or cutting more than one pipe, so the suction manifold can be move aside.
- Isolate the section of pipe by plugging the other end of the pipe, at the pool. For threaded 1.5″ skimmers, returns or drains, use a SP1022C plug with o-ring, or use a #8 or #9 winter expansion plug, to plug the pool end of the pipe. For 2″ lines use a #9 or #10 winter plug. Be sure that a tapered rubber plug is very tight, use pliers on the wing nut if needed.
- Fill the pipe with water from a garden hose, and after shaking well, add 1/2 bottle (16 oz) of Fix-A-Leak directly to the pipe where you cut the pipe, just pour it in there.
- Connect a Drain King to your garden hose, and insert it into the pipe. Turn on the hose spigot very softly, about 1/4 way, just enough so the Drain King expands to fit the pipe, and pressurizes the line to between 5 – 10 psi. Allow the hose to run at a low pressure for several hours. Shut off the water and add another half bottle (16 oz) of Fix-A-Leak, and repeat the process again but this time increase water flow to 1/2 way open for thirty (30) minutes, then 3/4 open for 30 minutes, followed by fully open for another hour, with pressure in the 10-20 psi range.
- Remove the Drain King, fill the pipe with water and mark water level. Cover to prevent evaporation, and check on it again in 24 hours. If water level has dropped, repeat treatment again. If water level is stable and holding, allow it to set for another 24 hours, then reassemble plumbing, remove plug(s) in pool, and start up filter system again.
In this process you are using the water pressure of the Drain King to force the emulsion into the crack in the pipe, slowly at first, and then eventually with more pressure, as the layers build up.
You don’t have to use a Drain King to pressurize the line, you could also use plumbing fittings to create a pressure testing stick or hose adapter rig, or you don’t even have to use water, you can use an air compressor to pressurize the line to between 5-10 psi initially, then up to 10-20 psi afterwards.
And, you don’t even need to cut the pipe, as long as you can disassemble a valve, or use a long hose and funnel to deliver the Fix-A-Leak into the pipe, and insert the Drain King into the pump (facing towards the pool). then use the valves to pressurize only the one specific line.



Dave, we opened our Gunite pool this year and I have one water feature pump with cavitation. I had a service guy here and we were able to determine that by closing the supply valve to the water feature, and opening the main Darin, which goes to both pumps, the cavitation started again. So now I know its the main drain line. I am goin g through salt and that’s why I suspect a leak and would like to repair. How do I apply this product when the drain is on the bottom of the pool?
Hi Chris, cavitation is not really related to pool leaks. Two pumps sharing one main drain is related to cavitation however, which is defined as a pump that is ‘starved for water’, or not enough water supply to satisfy the pump. Water feature pumps usually have their own main drain supply line, usually 2″ in size. I’m not convinced that you have a leak in the main drain line. More investigation may be needed.
After leaks have been sealed in the spa, how long till the spa can be used? Is this toxic to the skin? Can I drain the spa after leaks have sealed and replace with fresh water?
Hi Chris, I think I’d wait a few days before use, it is not toxic. Yes you can drain the spa and replace the water.
Hi, so do I have to drain the spa after I use fix a leak? It has been circulating for 2 days and the leak has stopped. The temp is 104 in the spa. Thanks
Hi Aimee, good question! Not necessarily, Fix-A-Leak is non-toxic, so no need to drain, unless your water is looking bad, or foamy, or smelly, which may not be from the Fix-A-Leak… If all looks good, keep it full!
Can I apply fix a leak to my in ground pool when my recirculate function on a Haywood multiport sends water out of the discharge line?
Hi Chuck, you can plug the line with a 1.5″ threaded plug, temporarily, like Hayward SP1022C, or any 1.5″ NPT threaded plug…
Does the fix a leak product work with an above ground Bestway pool without an advanced filtration system? Having trouble locating small leaks in the floor of the vinyl pool
Hi, it could, but the flow must be strong enough to draw the fix-a-leak to the hole, if water flow is too slow, it may not make it. You would also shut off the pump and plug the lines, and cover the pool if possible, to give it 48-hours to (hopefully) clog the leak(s).
Hello
I ha e a pool with no central drain and o lay two side skimmers. The two skimmers appear to meet at a y under concrete. The one closest to pump works well the other has no suction and returns emit lots of air. Thinking there is leak within the furthest skimmer line. How do I go about using fix a leak in this situation. No cut off it have plugs I can use at poolside, do I block both and add drain king at pump side. Please provide details
Hi Robert, that’s right pour it into the skimmer, plug both skimmers tightly, and insert a drain king at the pump, and turn the water on just a trickle, very low, valve barely cracked open. Let it run like that for 24 -36 hours (add shock to pool if needed), and then disconnect and start up filter pump. BTW, you can use ‘throttling plug’ on the skimmer near the pump, to increase suction on the one further away.
Hi Dave, I’ve isolated a leak on suction side of my skimmer and I’m bypassing pool ( 30’00 gallon guinite) using a closed loop. Barrel with submersible pump pushing water to suction manifold next to bypassed pump then back to barrel via garden hose.. I added just over 16oz about 30hrs ago and pump has run non stop at 7PSI… Looks like the leak stopped!!!! Should I continue running system and increase PSI 15-20?? Thanks
Thomas, that’s great, good work, you have pressurized the line slightly, which forces the emulsion chemical into the leak, where it sticks together, and begins to form something like a ‘scab’ over the crack or hole. Continue, yes. Raise pressure yes, but not up to 15, go to 10 psi for a day, then disconnect your setup and start up your filter system on mostly main drain, with skimmer just barely open. Run like that for a few days, and slowly open the skimmer fully to pull more flow, to allow time for the ‘scab’ to setup more fully.
Hi Davy. How long should I pressurize my closed skimmer suction pipe.. Plugged at skimmer with drain king next to pump.. Filled pipe with water and poured 16oz into suction pipe and water has been trickling in, with 8psi. How long should I trickle water at 8psi, and should I repeat process at 10-15psi? Thanks
Well, unless there is some specific time frame listed on the bottle, I would suggest maybe 90 minutes. Repeating at a slightly higher pressure is a good idea, as the hole or crack gets smaller, a bit more pressure will pack more emulsion in there. Have you seen the Marlig website? Might have some good info there – https://www.fixaleak.com/pools
I have a 16′ round pool. The liner has a leak I cannot find after days of looking. Its not the pipes hoses or pump because the water is a foot below the pump at this point. Would it work if I just dump in a double dose, run a pump (bypassing the filter) to stir it up for an hour or two then let it sit for 48 hours and see if it stops leaking? If so, I vacuum the remnants to waste then refill pool? Or would there be a better method? I just got the liner and installed it carefully and tired of sinking money into this thing but my daughter really loves the pool.
Hello, you can try the product. If the leak is large enough, and enough of this material is near the leak, it can seal up a vinyl hole. But if you have no idea where it is, then it may not find it either. A better method would be to go over every square inch of pool surface, wearing a mask and snorkel, until you find it. Use food coloring to dye test suspected leaks. Then patch with a vinyl patch kit or Anderson Liquid Sealer, or EZ Patch 28.
Are you supposed to ban swimmers from the pool after the product has been put in the water? If yes, for how long should they not enter the pool?
Yes, but not for any danger, but to let the product work. And by the way, you don’t just pour this in the pool and it magically fixes leaks, it’s not that way. This is an emulsion product that when passed through a leak, stacks on itself like blood platelets creating a scab to stop bleeding. It works in a similar way. Depending on the leak suspected, there are different ways of administering the fluid.
Do you have any knowledge or experience with using this product in an endless pool (liner version not swim spa)?
Hi Noelle, Fix-A-Leak is an emulsion product that will build up in layers, in the same manner as blood cells clot to stop a bleeding wound. It can be permanent, or it can break-free if under pressure or vacuum, like in a pipe. Endless pools and swim spas are usually above ground, so finding plumbing leaks can be easier. Or if the liner is leaking, the surface is so small that you should be able to find and patch a hole. If that’s not the case in your situation, you can try it. For liner leaks, just pour it in the water, near any suspected holes is best, if known. For a pipe leak, where known, it works best if the pipe can be isolated and filled with the Fix-A-Leak, and then put slightly under pressure, with a garden hose and Drain King for example, to create a very small amount of pressure, to slowly push the substance into the crack, where it can layer-up. More instructions are on the bottle and on the Marlig Fix-A-Leak website. Good Luck!
Thank you for your reply. I was unable to find this previously and thought I was unable to post for some reason. Clearly a novice with DE on the brain.🙄 I posted to another thread this evening with the “latest.” Hope you don’t mind the repost here.
“We have had ongoing problems with our 16 year old Hayward DE setup. First the spider gasket, then the pump motor, and a small crack in the housing. All replaced. Next pool started loosing water. Dye test and FixALeak didn’t help. Yada yada yada. Fast forward to now. Had a leak where prior mentioned were installed. Called the pool people to take over. Replubmbed filter set up yesterday and pump/filter is finally running again but bottom is still full of old DE and haven’t charged with New DE yet. Filter pressure is currently twice as high as normal and jet output is half of previous output. We are exhausted. So next step is Leak Detectors? I saw note here to check the filter, filter valve and return side pipes and valves for clogs or obstructions. Help!”
Hi Kate, if the filter pressure is high, but you have not added DE yet – that is the reason. Backwash the filter, and add the DE filter powder.
Normally the absence of DE in our system makes the pressure read 0 or so. normal pressure fully loaded with DE is about 16. Currently it’s like 40 and output through 2 return jets is half the velocity as previous normal flow rate. There has to be more at play here. ”Flow restriction after the pump”? Could this be related to the application of FixALeak? what else could cause restricted output and raise filter tank pressure? pressure test was supposedly “normal”
Hi Kate! if there was still a plug in the wall, or a partially closed return valve, that would raise filter pressure. It’s rare, but there are some situations where a plastic filter, heater, or valve part can break off and get stuck at a 90 fitting, and cause an obstruction. But do get some DE in the filter, DE filters should not be run without DE powder, it can damage the grids, and high pressure could damage other system components, or could be hazardous if something were to rupture at 40 psi. Fix A leak could also partially obstruct a pool line or pipe, if it were to settle and solidify in the crux of a 90 deg. fitting for example, or fill-up a short section of pipe to a depth that restricts water flow. It would also clog up DE filter grids if it were to enter the filter.
We have been losing water to the level of two returns. First applied putty around fittings, including two spa jets and around skimmer while water level was down. Still losing 1-2 inches overnight without pump running. (We had other pump/filter issues at the same time, so system has not been running.). In the meantime I purchased Fixaleak. We raised water level to above return jets and “injected” it into these lines. (We did not mix it with warm water first). After waiting a couple of days, it appeared to have slowed but may have been still losing water. Reapplied to both returns and waited. We then got a lot of rain, so was unsure if it had stopped. Made note of the water level again 2 days ago and this morning it is again down 1-2 inches. What next?
Hi Kate, I would verify that it is the return lines leaking by plugging the wall returns tightly with winterization plugs, to see if the leak stops when the two returns are plugged. (I’m assuming that your filter system is higher than the pool water level). If it was the return lines, and is leaking up to 2″ per night, with the pump off (a big leak!), I would find the crack and replace the pipe, or run a new pipe. I know that sounds drastic, but Fix-A-Leak won’t work on such a large leak in most cases. Another option could be to blow some sort of rubberized emulsion to coat the inside of the pipes, but that’s so complicated, you may as well just replace the pipe. Especially if you have a standard 3′-4′ concrete deck around the pool, you could dig a trench (call811 first) from the filter to the wall returns, and tunnel under the deck where needed, and run all new pipe. Start with the tunneling under the deck, because you may find the leak fast, and can replace just the section of pipe under the deck and close to the wall, which is where many breaks occur. Second most common break would be directly underneath where the return pipe enters the ground, after the filter. Digging down to expose the 90 and the pipe after the filter, is also a good exploration, and may reveal the problem area fast.