Preparing a pool for a re-plaster coat is not something that is ordinarily done by a homeowner. Same thing with plastering a pool, these things are best left to the pros, who understand the art and science behind applying underwater pool surfaces.
There are a few differences in prepping a pool for new plaster, but the objective is the same – for the best bond of the new surface, the underlying surface must be clean, solid and rough. Just like painting a wall, if there is peeling paint, dirt or grease, the bond will be poor and the chance of problems increases.
Here’s the general process for prepping an inground pool for new plaster, for your information – but please, leave this to the professionals.
- DRAIN THE POOL: It’s unlikely that your pool filter pump can drain the entire pool, they often lose prime eventually, leaving you with 1000 gallons left in the deep end bowl. But, you can use the filter pump on the ‘Waste’ setting (if you have a multiport filter valve) to drain most of the water out. For the remainder of the water, you’ll need a small sump pump, or a large winter cover pump. Running the hose up the shallow end floor creates less resistance than running the hose straight up the deep end wall, which will give you faster flow rates. You’ll need to be able to get ALL of the water out of the pool, a wet/dry vac or bucket and large sponges can be used for the last few gallons. If using a wet/dry vac, don’t try to roll it up the slope and lift it to empty – put your sump pump inside of it to drain it when full. Be sure to pump the pool to a point far away from the pool, or to a downhill slope or storm drain (if allowed by your Water Authority), to avoid pool water coming to rest underneath the pool, which leads me to our second point.
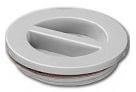 OPEN THE HYDROSTATS: Hydrostatic relief valves are installed into the bottom of inground pools, to relieve hydrostatic pressure (water pressure) and prevent a ‘popped pool’. In most cases, the sheer weight of a gunite (concrete) pool is enough to hold it firmly in the ground, but in cases of a high water table, or pool located near a large body of water, or sustained heavy rains, opening the hydrostat ‘valves’ or holes in the floor of the pool can prevent a pool from popping.You’ll see them plastered into the floor, as white circles with a bar across them, and one will be located in the bottom of the main drain pot. Unscrew the main drain hydrostat plug with pliers, and locate the 4-6 others in the plaster. Chip out the plaster around the threaded plug, and use pliers to remove them all. Don’t worry if they are mangled during removal, they will be replaced with new just before plastering.
- REMOVE THE LIGHT AND FITTINGS: The pool light is removed by loosening the screw at 12 o’clock on the bezel or trim ring. Pull it up and set it on the pool deck. If the plastering company wants you to remove the light and light cord, attach a string to the light cord before pulling it through, to make it easier to pull the light cord back through again after plastering – but the easiest way is to just leave it on deck and work around it. Now remove all of the wall fittings (eyeballs or other return fittings), and the main drain covers. Tape over the main drain screw holes with duct tape to keep out debris and grit (and plaster).
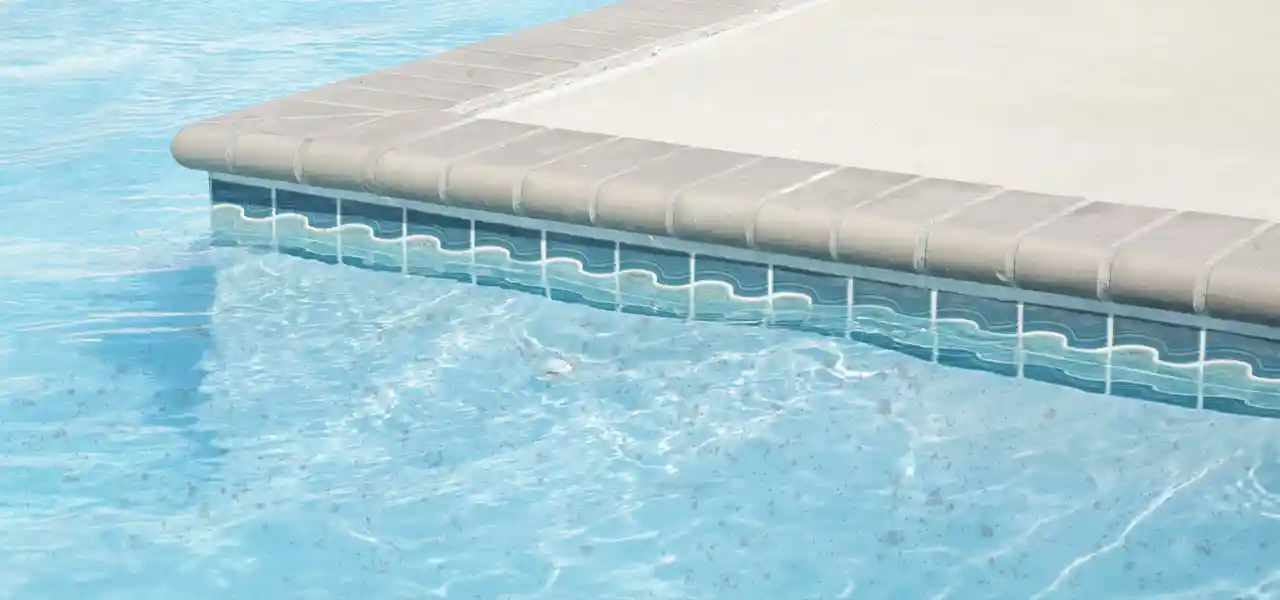
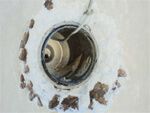 CUT & CHIP: Here’s where it gets industrial. Using a 4in grinder with a diamond blade, (and wearing heavy leather gloves and eye protection), use the grinder to cut beneath the perimeter tile line, removing about 1/2in of plaster beneath the tile. This creates a ledge that gives the new plaster something to grab onto, and allows the plasterers to feather up to the bottom edge of the tile. Speaking of tile – if your pool steps or swimouts have trim tile laid flat or horizontally, these are commonly chipped off and replaced for a more uniform and attractive appearance. Tiles set in the pool floor like racing lines, can be ‘cut & chipped’ on the edges, or removed and new ones set in place 1/4in higher than the old tile.Use the grinder to cut a line around the trim tile, and then use a power chipper (air or electric) to remove trim tile on the edges of steps. After the tiles are done, use the grinder and chipper tool to cut around the pool light niche, pool returns, main drain(s), rope hooks, hydrostats and any other plumbing or accessory fittings in the pool walls and floor. Cut several inches away from the fitting as shown in the picture, and chip away the previous (current) plaster coating around them. Like cutting under the tile, this allows the new plaster to come up flush to the fittings, to ensure a nice appearance and good seal. Speaking of seal, if your chipping around the fitting exposes loose or wet gunite, or cracks around pipes or fittings, remove all loose material, and repack with a hydraulic cement days before plastering. Leaks around pipes and light niches are not uncommon, so be sure it looks solid after cutting and chipping.
- CHECK & REMOVE DELAMINATIONS: If your pool has been plastered before, there may be hollow spots where the most recent plaster coat has separated (delaminated) from the previous plaster coating. There are several ways to find these hidden areas. Some use a broom stick, or piece of long 1×2 lumber, and tap the entire surface, listening for hollow sounds as they tap. A pressure washer will also usually sound different as the spray goes over a hollow spot. Or you can tap the surface with a hammer or even a golf ball – but whatever method you choose, you must check the entire surface, walls and floor. Delaminated areas eventually become ‘pop-offs’, which will break through your new plaster coating. When you find an area of delamination, and you likely will find at least a few if not dozens – they need to be completely removed. This is done with air hammer chisels or electric mini-jackhammers, to remove all loose material, down to (and out-to) solid material. Often, a small hollow sound of 1 sq ft will result in 5 sq ft being removed – keep chipping around the edges until you are sure you’ve reached solidly bonded areas.
 CUT OUT ANY CRACKS: If your pool has any cracks in the floor or on the wall, and I’m not talking about tiny check-cracking, but actual cracks that you can stick a flathead screwdriver into – use your 4in grinder to open up these cracks to 14/in wide. Use a dovetail cut with the grinder held at an angle, also known as a keyhole cut, opposite of a V shaped cut. This will allow the plaster to fill the crack more solidly, with less chance of the crack reappearing through your new plaster coat. Any rust spots also need to be cut out and sealed over.
- FILL IN CRACKS AND DELAMINATIONS: If you had any cracks or delams, and it’s unlikely that you won’t the best practice is to fill them in with hydraulic cement before plastering. Be sure that the areas to be patched are cleaned well with a TSP solution in hot water, and thoroughly pressure washed before making your patch. For hot weather, keep the patch moist by laying wet burlap over the area, to slow drying – which prevents shrinkage cracks.
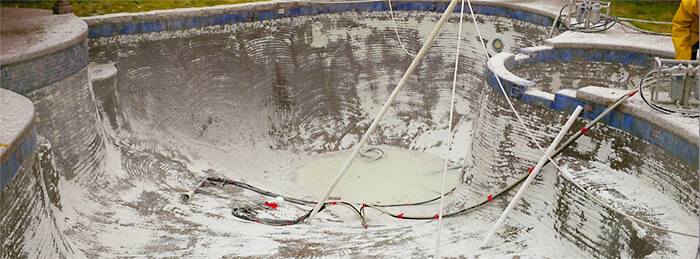
- ACID ETCH THE POOL: Acid etching is normally accomplished using straight muriatic acid, poured onto the walls and floor in sections, and rinsed off after it has been allowed to ‘burn’ for a few minutes. You’ll also need soda ash (pH increaser) to neutralize the acid/water that collects in the shallow end – before pumping out the waste water. For plastering companies that prefer to scarify the existing plaster, essentially removing all of the existing plaster (like the header image at the top of this page), less of an acid burn is needed, when the gunite is exposed, which is naturally rough. If you choose to scarify, you can rent handheld scarifying equipment to scrape off the old plaster – but it’s a nasty, dusty job!
- PRESSURE WASH THE POOL: As a final step, a pressure washer may be used to remove any traces of acid and any loose grit that remains on the surface of the pool. Pump out the remaining water and grit and get all of the water out of the main drain. Use duct tape.
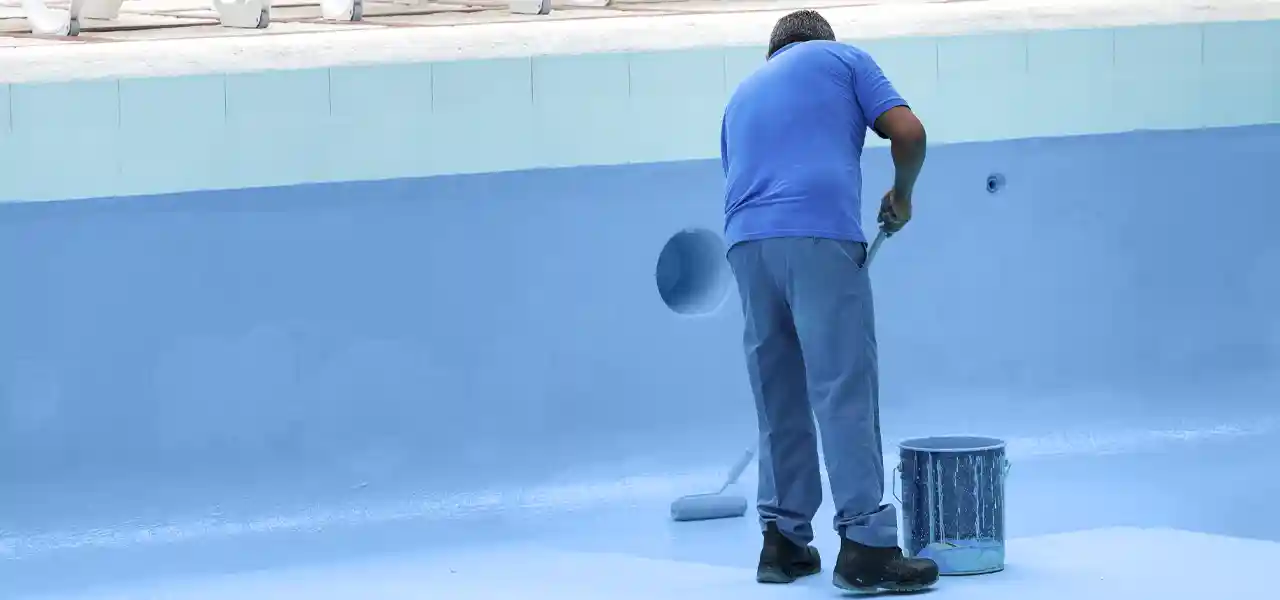
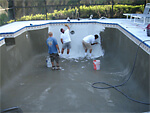 APPLY A BOND COAT: Also known as a scratch coat, many plastering companies (those that don’t scarify the pool surface like the image shown on top of the post) will add a scratch coat of brown plaster with high aggregate content (quartz or silica) to the pool surfaces to help improve the bond. This is commonly applied with paint rollers to the entire pool surface, and allowed to dry naturally. Be sure to check the weather before applying, although it will dry within several hours. to tape over the entire main drain, to keep out plaster. The brown scratch coat is being applied to a pool, as shown in the image on right.
A company in Texas, known as G & B Tile and Plaster, uses special scarification processes to remove most of the plaster from the surface, as shown in the image at the top of the page. The process is called Hydro Demo, and uses high pressure water and air to blast off old plaster (and hidden delaminations), while creating a perfect substrate for bonding, without acid washing or scratch coats.
And there you have it – how to prep a pool for a new plaster coating. Not rocket science but it does have some hazardous points, not the least of which is an empty pool which can be more dangerous than a full pool – if one were to fall in.