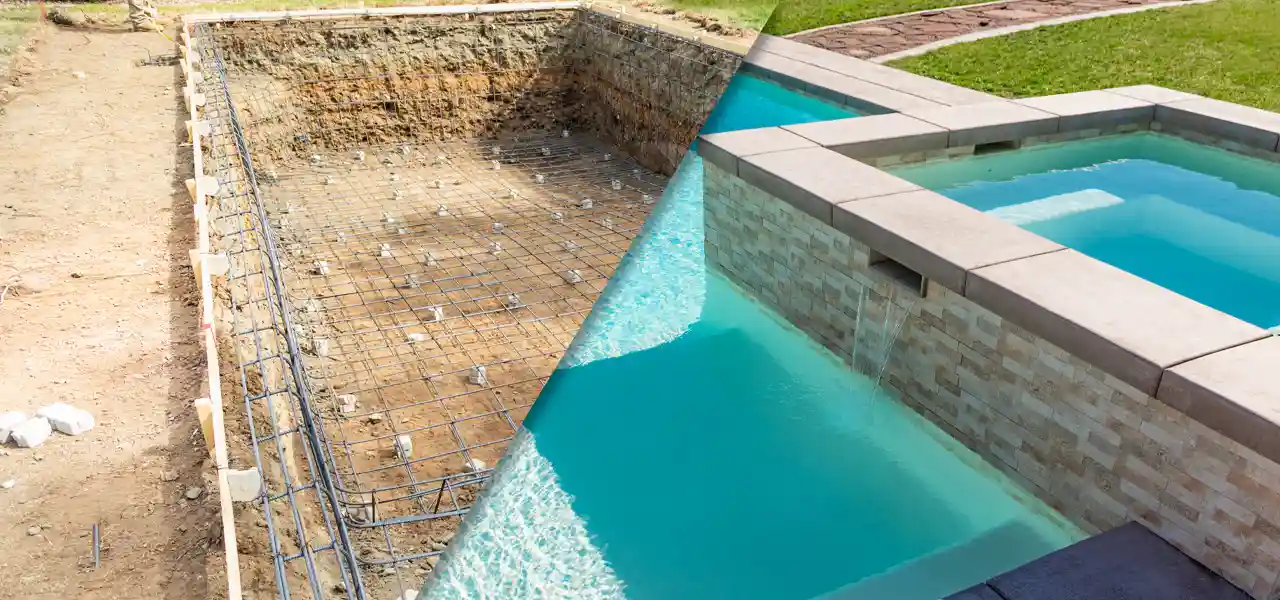
When building your own inground swimming pool, there are many details that are important to know. One topic area that is often oversimplified is the plumbing of the pool, or specifically, installing the main drains, skimmers and returns. Here’s a step by step process for each of these, covering the finer, and very important details.
MAIN DRAIN INSTALLATION:
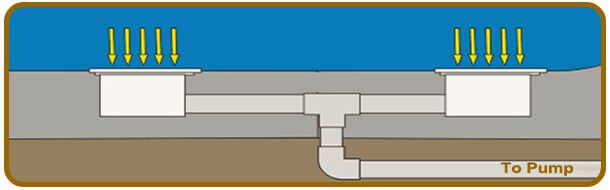
Let’s start with your Main Drains, and I said Drains because if you do install them in your pool you must have two drains installed, side by side. You aren’t required to have any – but you can’t have just one. The two main drains should be at least 3 ft apart from each other at the bottom center of your deep end hopper pad.
To install the main drains into a vinyl pool, first remove the cover and face plate off of each main drain pot, and tape over the opening, covering the faceplate screw holes with duct tape. There is a 2″ plug included with each main drain you will use that to plug the bottom hole in each main drain. Use Teflon tape and a little pipe dope before you screw them in, to be sure they won’t leak.

Screw in a 1.5″ male threaded adapter in the side of each main drain. Flip both main drains over, so they are upside down on a level surface and use primer and PVC glue on a 3 ft piece of pipe between them. You can use either flex or rigid PVC. Cut the pipe in the center and install a 1.5″ Tee fitting, with the third port of the tee facing a horizontal direction, either 3 or 9 o’clock.These secondary ports in the main drain pot give some plumbing flexibility, or they can be used with a spring loaded hydrostatic plug, for areas that have a very high water table.
Run a short pipe from the Tee fitting to a sweep elbow or two 45 fittings. This connects to long sections of pipe that run up and under the wall panel and all the way back to the main drain valve, on the equipment pad. The pipe should run in a narrow, shallow trench across the floor and up the deep end sidewalls to where it exits the pool, just under the wall.
When the connected main drains are securely plumbed together, recheck the finished height and pour or trowel your deep end hopper area around the main drains, and install your pool flooring material on the deep end side walls, covering the small pipe trench. Your floor material should come right up to the very top of the main drain pots.
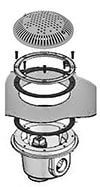
After the liner is installed and you have a few inches of water in the bottom of the pool you can now carefully go down to the drains and you’ll see the impressions of the screw holes through the liner. Place the second gasket and face plate over the screw holes and carefully screw in two screws on opposite sides, then go ahead and put the rest in. Use a large #3 Philips head, and really torque the faceplate screws tightly. When they are all in and snug, then trim out the inside of the face plate with a razor knife, and attach the main drain covers securely.Before you install the pool liner, cut away the duct tape over top of the main drain pots. Line up one of the main drain gaskets to the screw holes, and attach it to the main drain with either gasket cement or a few small strips of duct tape. I suggest the duct tape.
RETURN LINE INSTALLATION:
Now let’s look at how to install return wall fittings in a vinyl inground pool. Our pool kit steel wall panels have pre-drilled holes for the return fittings. Make sure that you do not install this wall panel upside down, the hole should be about a foot below the top of the panel.
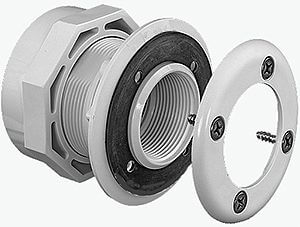
Remove the 4 screws and face plate and store this safely until the liner is installed. Underneath the face place, you’ll notice a black gasket already glued in place, that is the only gasket you’ll need for the return. After the liner is installed and the water level has reached the wall fitting, you will notice the protrusion of the return, and can see the screw holes through the vinyl liner. The face plate you are putting on will have notches on it – line up the notch over the bump out and firmly push the screws in through the holes. Tighten very snugly, with a #3 Philips head. After you get the screws in, then trim out the inside vinyl with a razor knife and screw in your directional eyeball fitting.Wall fittings go in from the front of the wall through the panel and the large nut screws on the outside of the wall to hold the fitting in place. To install, remove the large nut and push the fitting through the wall, and tighten the nut up tightly with large channel type pliers, on the back side of the wall. Most pools have at least two returns, usually one on each end. Run equal lengths of pipe, to meet each other at a tee fitting, on the equipment pad side of the pool. If the lengths are not equal, you will get lower flow from the return that is further away. From the tee fitting where two return pipes join underground, run a single pipe straight to the equipment pad, on the return side, opposite end from the suction pipes.
SKIMMER INSTALLATION:
Our vinyl pool kits use Hayward skimmers, other manufacturers of pool skimmers may be slightly different to install. To start, remove the face plate and screws on your skimmer, and put these in a box or bag, someplace safe. Place the skimmer on the outside of the pool wall panel with the skimmer cut out; there are 4 holding screws that go from the inside of the pool wall into the skimmer body. Have a helper hold the skimmer in place on the outside of the pool wall while you secure the round head screws into the skimmer from inside the pool. Place one of the gaskets on the skimmer with gasket cement or a few strips of duct tape, lining it up with the screw holes.
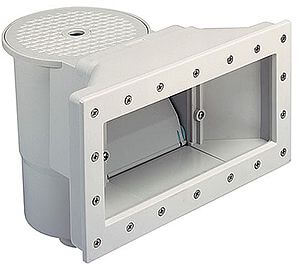
When the pool water gets up to the bottom of the skimmer, then put on the second gasket and install the face plate with all the screws tightened very snug. Trim out the inside of the skimmer face plate vinyl. You can save the pieces you cut out to use as future vinyl patch material.To plumb the skimmer, you will first notice that there are two holes in the bottom of the skimmer. This allows flexibility for plumbing, but you will only use one hole on an inground vinyl pool. The skimmer comes with a 2″ plug to seal up the second hole. In the other hole, screw in the male threaded pipe adapter. Put Teflon tape and a little pipe dope on the threads to seal them tightly. Then connect your PVC pipe to the fitting with primer and glue, and run the line all the way to the equipment pad. Stub up the pipe about a foot away from the main drain pipe, on the suction side of the equipment pad.
RIGID, FLEX or POLY?
Our inground pool kits include 100 ft of schedule 40 flex pipe. Flex pipe is easier to work with than rigid PVC pipe, and you won’t need as many couplings or 90’s. Many people (including myself) will use rigid pipe at both ends. I use a few feet of rigid pipe connected to the skimmer and return, and then also coming out of the ground at the equipment pad. The length of pipe running between the pool and pad, on the floor of the trench, is flex pipe. And all the equipment pad plumbing, what you see – is done with rigid PVC pipe. So, to the question of rigid or flex? I say use both, rigid on both ends, with flex pipe between, buried deeply.
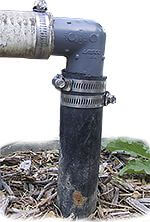
I do not recommend black poly pipe, my method of rigid, flex, rigid is a much more durable and trouble free way to plumb your pool. Black poly pipe is more subject to leaking down the road, than using glued PVC pipe and joints.Another option for plumbing an inground pool kit, not so common anymore, is to use black poly pipe and barbed fittings. If you’re using black pipe you will connect sections using poly grey fittings with barbs on the end. With that type of pipe you put a coating of pipe dope on the barbed end and heat the pipe just a little put it on over the pipe and double clamp it with clamps tightened in opposite directions. On all the threaded parts of any of the fittings, use Teflon tape and pipe dope for a better seal.
Good stuff, huh? At ITS, we like to over communicate the details, and for our customers that work with us on their inground pool kit project, the team of ITS Pool Experts is here everyday – for deeper discussions into the details of building your own inground pool.