Cleaning up a swampy green pool is no walk in the park, it can take hard work balancing, cleaning and filtering the water to return a dark green pool to swimming condition. And vinyl liner pools present a particular challenge. You’ve probably been told that it’s best not to drain a vinyl pool, and you may be rightly concerned about using very harsh chemical treatments that could harm the pool liner. So, what’s a vinyl liner pool owner to do? This article details how to fix green algae in a vinyl pool
Step One: Clean the Pool
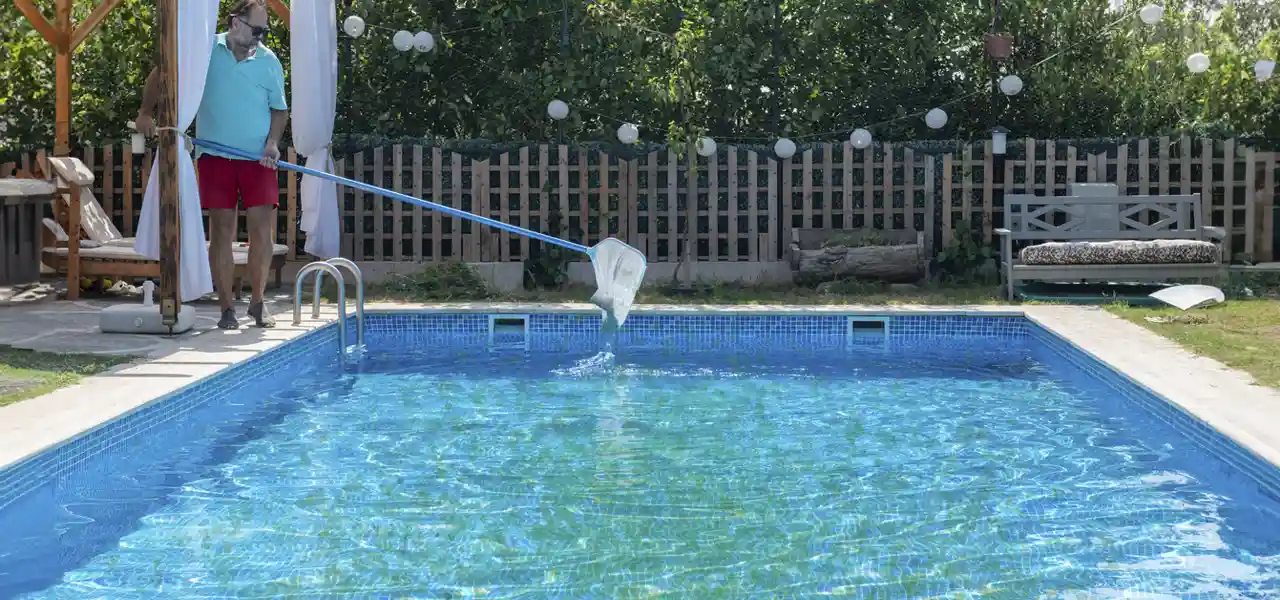
The first thing that has to be done when dealing with algae in a vinyl pool is cleaning the pool. Doing so remove as much organic debris as possible. There’s no way the water will come back if you have a layer of leaves on the bottom of the pool, or floating around on top. Cleaning should be done daily. Vacuuming, skimming and brushing the pool to remove accumulated dirt and algae from the walls and floor.
Vacuuming to Waste
If you have the ability to vacuum to waste (with a multiport valve), this will make the process easier. Roll out the backwash hose and put the multiport valve onto the Waste setting. Fill the pool up first, and keep a hose running while vacuuming if necessary, and vacuum fast – before the water level drops too much.
Cartridge filters are often plumbed without a way to vacuum to waste, unlike sand or D.E. filters that have a multiport valve. However, a handy homeowner could install a 3-way Jandy valve between the pump and cartridge filter, or a Tee fitting with a plug, to allow for vacuuming to waste.
Heavy Duty Floor Cleaning
Use a leaf rake to scoop the bottom of the floor, being gentle if there are large sticks and heavy debris in the pool. Keep at it until there is only very small dusty debris left in the pool, then vacuum the rest out of the pool. After skimming the pool water, give all the surfaces a thorough brush. This is very important after you get all of the debris out of the pool, and helps to loosen the algae in the walls and floor. Just remember to use a soft, vinyl-friendly brush!
Step Two: Replace Some of the Water
If you pump a liner pool completely out, especially an inground liner pool, the liner may relax and wrinkles can occur when it’s filled again. Using a vacuum to set the liner while refilling can be done, but if the liner is very old, it may shrink somewhat, and wrinkle or even tear when being refilled.
But, you can drain a third or half of the pool, and refill with a garden hose. Place a submersible pump on the top step in the shallow end, so that there’s no danger of pumping out the shallow end. As long as you leave 6″ of water across the shallow end floor, the liner should not relax, and give you no problems.
If you have a separate main drain line for your pool, use the main drain to drain the pool past the skimmers, just be sure to watch it, so you do not completely drain the pool. As the pool drains, hose and brush off the steps and walls if there are any dirt or stains, but do not use a pressure washer!
Step Three: Balance the Water
There’s no real reason to add any chemicals until you get all of the algae out of the pool, so make sure that the pool is about 95% clean before you try to balance the water. Test your pH, Total Alkalinity, and add any adjustment chemicals to get these right first. Your pH level should be on the low side, adjust it down in the range of 7.2 – 7.4. Total Alkalinity for vinyl pools should be at least 70 ppm.
Calcium Hardness is the next thing to check and adjust. For vinyl pools, calcium should test at least 150 ppm. If you are under this, add Calcium Hardness Increaser to increase the hardness of your pool water.
Cyanuric acid is important to check before you begin chlorinating the pool. Bright sun can burn off a lot of chlorine in a pool without at least 20 ppm of cyanuric acid (conditioner or stabilizer) in the water. Add conditioner to the pool if a test shows the level is less than 20 ppm.
Step Four: Shock the Pool
After adding fresh water and balancing the water chemistry again, your chlorine shock will be much more effective, so you won’t need nearly as much. This saves lots of money, but also is gentler on a vinyl liner. Once you’ve cleared up most of the algae in your vinyl pool, it’s time to bring in the big guns.
Dissolve 2 bags of pool shock per 10,000 gallons, by pouring them into a 5-gal bucket filled with water. Use a stirring stick to dissolve and then pour the mixture around the pool edge. Add enough shock until the water turns a cloudy blue color, which shouldn’t be more than 2 bags of shock per 10,000 gallons (some shocks are stronger than others). Be sure that the pH level is on the low side before shocking, 7.2-7.4, where chlorine is most potent.
If Your Vinyl Pool is Still Green…
Let the pump run 24/7, backwashing or cleaning the filter as needed. If you really tried all of the suggestions above and you still have algae in your vinyl pool…it’s time to use flocculant. A flocculent is a chemical that bonds to anything floating in the water and sinks it to the pool floor. You have to be able to vacuum to waste all of the “jelly” that settles out the next day.


Do you know a pool guy in West Covina the can clean in ground vinyl pool that is very green