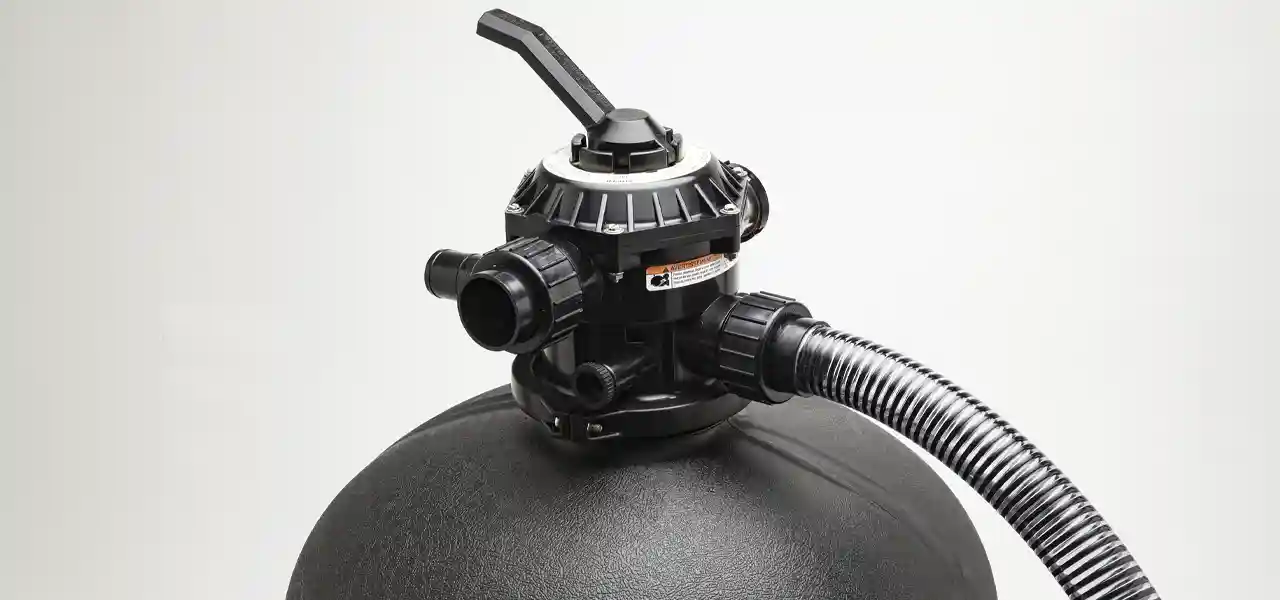
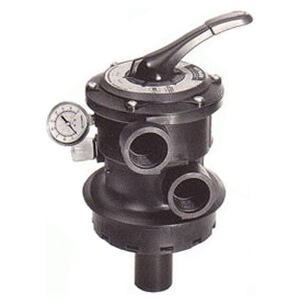
Sand and DE filters often use a Multiport valve to reverse the flow into the filter for backwashing. But it also makes the multiport valve a fairly complicated piece of pool equipment. When a pool filter is leaking, half the time it’s actually the multiport valve that leaks. The usual multiport problem is leaking water, or water coming out from somewhere it shouldn’t. So then, today’s post is about leaky multiport valve problems and solutions. 6 specific types of multiport valve leaks.
Multiport Valve is Leaking Around the Handle
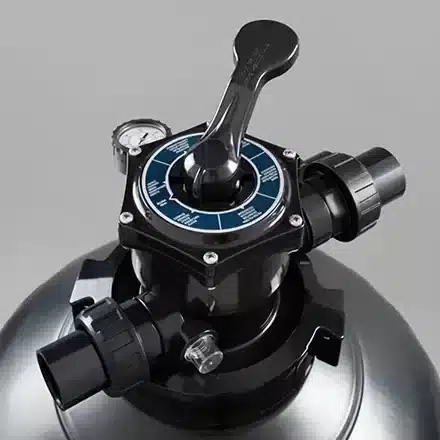
There is always some rain water that collects around the handle, but if water starts to ooze up and overflow onto the lid, you have a common multiport valve leak. Underneath the handle is a large Teflon plastic washer, but this is not the cause of the leak. The handle connects to the stem (with the pin), and on the stem are two small o-rings that seal up to the underside of the cover. These two o-rings, about the size of a quarter, fit onto the stem (which is connected to the rotor, aka footpad or diffuser or diverter), or they fit under the cover. Over time, they may wear out or dry out or blow out, or lose their lubrication. Cold water temperatures will make it worse, as the o-ring can shrink just slightly, or small bits of grit and debris can get wedged up around the stem o-rings, causing leaks.
For this situation, I would first just reposition the valve. Shut off the pump and push down on the multiport valve handle fully, once or twice. Move it slightly left and right and then back to the Filter position. Use a sponge or leaf blower to remove the water sitting under the handle, and turn the pump back on and see if it still leaks. Often, just reseating the stem o-rings will seal up a leaky mulitport lid cover. If that didn’t work, then you may have to consider a valve rebuild. The easy route is to buy the ‘Key Assembly‘, which is everything but the valve body, or from the handle to the rotor. The much cheaper way is to remove the key assembly from the valve, and knock out the pin to remove the handle. Then you can pull off the cover, and replace the stem o-rings. Be sure that during reassembly, you orient the cover and rotor to each other in the same direction as before.
Multiport Valve is Leaking Around the Cover
When the leak is around the outside of the top, where the lid mates with the valve body. The first thing to check is that the system is not under unusually high pressure, from a dirty filter, closed return valves or plugged wall returns. If normal, check that the cover screws are all tight.If it’s still leaking, remove all cover screws and pull out the key assembly. Clean, inspect and lubricate the large cover o-ring and place back into the groove in the key assembly. Replace the key into the valve and tighten up the cover screws, then fire-up the pump to check for leaks. Valve cover o-rings don’t usually go bad over time, but if it’s broken, dry-rotted or damaged, you can replace just the cover o-ring.
Multiport Valve is Leaking Around the Gauge
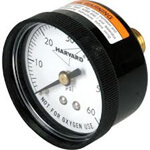
Another common leak is a small trickle of water running down below the pressure gauge on top mount sand filters. You want to make sure the gauge is firmly held in place, if the gauge were to shoot out under pressure, you could lose a lot of water before discovering the leak. One cause of this is too much Teflon tape on the pressure gauge – years of it! If you’re guilty of this, peel off the previous years’ layers and lay on 1-2 new layers of Teflon tape (always wrapping the threads in a clockwise direction).
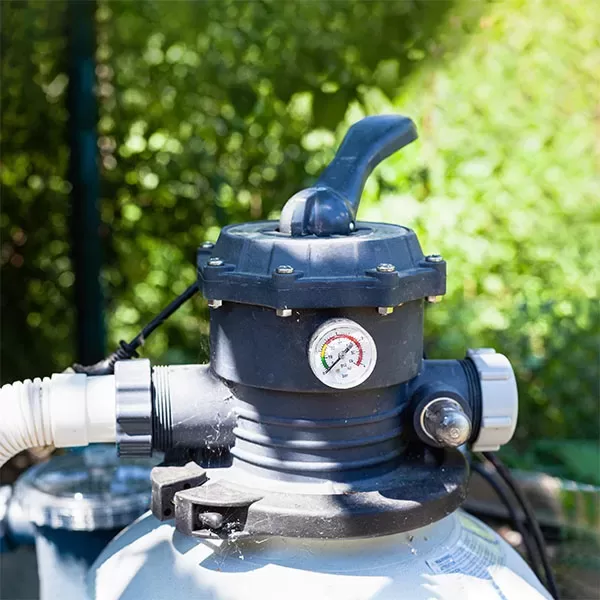
Another cause of a pressure gauge leak on a multiport is that the plastic threads in the valve body are stripped. The valve threads can’t be tapped or rethreaded, because then the gauge threads will be too small. If you definitely determine that the threads are stripped inside of the valve, you can thread in a Heli-Coil or other 1/4in-20 thread repair insert, which involves tapping out the hole slightly larger, and screwing in a double threaded ‘helix’ type of bushing, which gives you new 1/4in threads for the gauge.
A third cause of the pressure gauge leaking problem is when the valve body is cracked just below where the gauge screws in. This is usually caused by too many layers of Teflon tape on the gauge, and overtightening or cross tightening the gauge. This splits the plastic valve body and causes a leak, but there is a simple repair. Shut off the pump and tighten the gauge more to open up the crack slightly. Clean it out with a toothbrush or small wire brush, and be sure it’s dry. Squeeze Super-Glue into the crack, from top to bottom, and quickly unthread the gauge, so the crack will close up. After an hour or so, replace the pressure gauge carefully, after having removed the years of Teflon tape buildup, replacing with 1-2 layers of new Teflon tape or other thread sealant. Be careful not to overtighten the gauge, just 3 or 4 turns, or until it feels snug.
Multiport Valve is Leaking Where the Pipes Connect
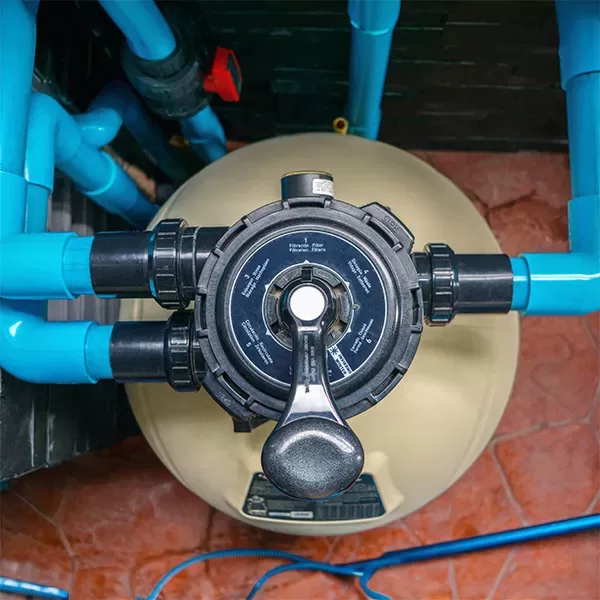
Multiport valves have 3 ports, Pump, Return and Waste, where pipes are connected, using 1.5in or 2in threaded pipe or adapters. At the point where the Pump and Return pipes are threaded into the valve is a common spot for a leak. One cause of this is when a hot pool heater backs up hot water to the valve, which shrinks the PVC connector. In this case, a PVC replacement is in order. Another cause of leaking multiport pipes comes from sagging pipes from movement of the equipment or equipment pad, not very common but it can happen. The most common cause is over-tightening the adapter into the valve, which can cause a crack to appear later during a ‘high-pressure event’. Events such as closing a return valve while the pump is running, or starting up the system with plugs in the wall returns, builds up a lot of pressure and could even blow the pipes right out of the valve.
If the valve body is cracked just below where the pipe screws into the valve, you can replace the valve body, or you can try to repair the crack with Super Glue, as described two paragraphs above. Or, replacing the entire multiport valve may be in order, if the key assembly parts are old and worn.
If the drip is very slow or oozing, you can safely ignore it for awhile. If it begins to saturate the ground under the equipment you may want to take action. You can replace the PVC fittings and some pipe, which you can find at any home or hardware store, along with pvc primer and glue. On the new fitting, smear RTV silicone sealer on the threads and then wrap it 3x with Teflon tape. Hand tighten, then turn with large pliers for another full revolution, being careful not to overtighten. Reconnect the pipes with a coupling or union.
Multiport Valve is Leaking Out of the Waste Line
Water is supposed to stop coming out of the waste line after you stop backwashing the filter, but eventually you will notice that water is leaking out the backwash line all the time, not good. First thing I would do is to shut the pump off and push down on the handle fully, turn the valve slightly left and right, and then back to Filter position. Sometimes small bits of debris get stuck between the rotor and spider gasket, and this flushes out the valve. Turn on the pump again to check if that helped. If it still leaks after repositioning the rotor onto the spider gasket, shut off the pump again and remove all of the cover screws, and pull out the key assembly.
Inspect the spider gasket (wagon wheel shape) for wear or damage (note that some Pentair valves have the spider gasket on the bottom of the rotor). If you find that the spider gasket looks good but is just loose, break out the Super Glue or silicone, and use dabs to glue any loose rubber down into the (dry) grooves of the valve body. If the spider gasket looks too far gone, badly twisted and torn, you should replace it. Be sure to use the correct gasket (or use a Valve Go-Kit) for your valve, as they are all different sizes. Scrape out the old gasket with a sharp, small flathead screwdriver, removing all tiny bits of rubber, and glue the new gasket in place (flat side down), using dabs of Super Glue or silicone in the (dry) grooves. Tighten the key assembly in place over the new gasket (no lubrication needed), and you’re done replacing a spider gasket.
Another cause of a backwash line leaking is that the spring inside of the key assembly has failed. When this happens, your valve handle is floppy and there’s no tension when you push down. Chemical corrosion can break down the stainless steel spring over time. Remove the key assembly and look under the lid at the spring to check for rust that has broken the spring’s coil. To repair, you can just buy the new key assembly, already assembled, or you can break down the valve and replace the spring. To do this remove the key assembly from the valve, and knock out the pin to remove the handle. Then you can pull off the cover, replace the spring, and while you’re in there, replace the stem o-rings too. Be sure that during reassembly, you orient the cover and rotor in the same direction as before.
One more thing – please don’t repair a leaky backwash line by gluing a valve on the backwash line! I’ve plugged the waste line before, in a pinch – but it should be avoided; these problems above can cause water to bypass the filter, resulting in poor filtration, and – one time in the future someone is going to forget to open the backwash line before backwashing, which can cause even bigger problems.
Multiport Valve is Leaking at the Filter Tank
Slow seeping weeper running down the filter tank? Top mounted multiports attach differently than sidemount multiport valves, so let’s take them each separately.
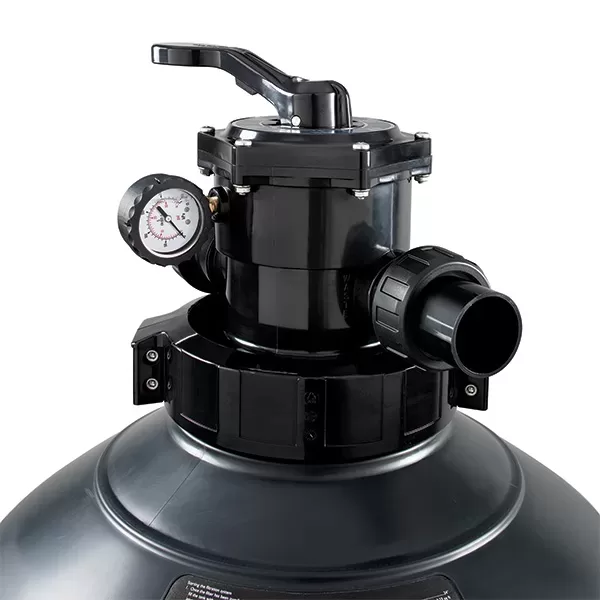
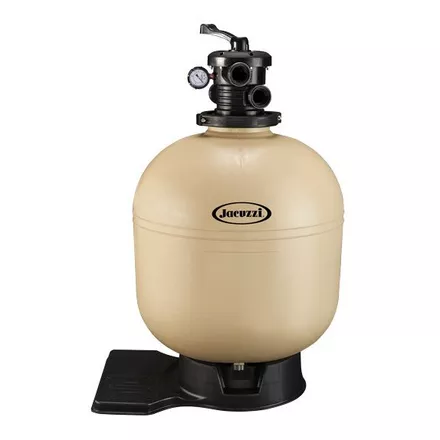
Top mounted valves used on sand filters, attach to a flange that is molded onto the top of the filter tank. First determine if the leak is coming from between the tank and the flange, or the valve and the flange. If the flange is leaking where it connects to the tank, I’m afraid I don’t have much help for you. But if the leak is between the valve and the flange, the first thing to check is the tightness of the bolts or the clamp band (turn the pump off first). Repositioning the clamp band and retightening can help in some cases. Unlike my many cautions above to not overtighten PVC fittings into the multiport valve body, when tightening clamp bands, there is no such thing as too tight. Tighten down clamp bands until they squeak and creak, often times this will fix a leak between the filter flange and filter valve.
If you can’t get the leak to stop, you can pull off the valve to inspect the flanges and flange o-ring. To do this you may need to cut the pipes with a hacksaw, and glue couplings to reconnect the pipes afterwards. If you have unions, or install unions instead of couplings, you can quickly disconnect the Pump and Return pipes (for valve repairs, sand changes, or other repairs). Replace the flange o-ring if it looks dry rotted or damaged. Use lots of pool lube on the o-ring and flanges to improve the seal and tighten it all up again. If it still leaks, or weeps, check to see if return side pressure can be reduced, by changing filter sand, and/or reducing resistance after the filter with less equipment, straighter runs or larger diameter pipe.
Leaking Side-Mounted Multiport Valve
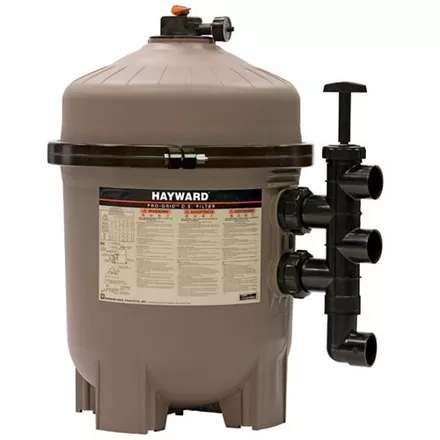
Side mounted multiports, used on sand and DE pool filters, connect to the filter via two (2) Bulkhead Unions, and two sweep arms. DE multiports and Sand multiports are not interchangeable, because they operate in reverse. For sand filters, water enters on the top bulkhead, but for DE filters, water enters the tank through the bottom bulkhead.
For leaks on side-mount multiport valves, determine if the leak is between the tank and the bulkhead or the bulkhead and the filter. To disconnect a side mount valve from the filter, open the air bleeder and drain most of the water from the filter tank, then loosen the bulkhead union nuts. Pull back on the valve and/or push on the tank to pull them apart, and be prepared to support the valve after pulling it off (cinder block or bucket), to avoid a lot of weight on connected pipes. Inspect and lubricate the o-rings on the valve sweep elbows. Filter tank Bulkheads can be tightened up by turning the large nut inside of the tank, using very large pliers or a strap wrench. Bulkheads also have gaskets and spacers on both sides of the tank wall, that may need service or replacement at some point – which may be after you’ve tightened the bulkhead, but it still continues to ooze water. Bulkhead parts are considered filter parts, not valve parts.



Hello and thank you. I have a Pentair SD40 I recently replaced the sand. (150lbs). Ever since it seems the filter is bypassing the sand and just dumping dirt right back into pool. All cloudy and all chemicals are balanced. I have since replaced thr sand twice, checked for channeling and replaced spider gasket. Still no good. I am starting to think my valve is bad? Why else would it just bypass? TIA
Hi Ed, a couple of possibilities, which may not apply, but here they are anyway 1. Valve plumbed backwards on the in/out ports 2. Pump is way too large for the filter size and design flow rate 3. Bad filter sand, mislabeled and not graded correctly 4. Problems with valve, like broken spring under lid, or gasket installed upside down (flat side goes down), or gasket not glued in place
My Poolrite V700 multiport valve seems to be leaking above the flange, where the valve body is moulded onto the black flange that is screwed onto the filter. Is the any way to fix this ? Is it a common problem ?
Murray, there is surely an o-ring or gasket in-between the valve body flange and the tank flange. It may be damaged or out of the groove. Perhaps the valve clamp is loose. If it is not leaking between the two flanges, but leaking from a crack in the valve body, you could try to fix it with Superglue, or may just need to replace the valve body or entire valve.
Thanks Davy, it definately leaking from between the valve body and the flange, it is running out over the flange rather than over the sand filter base. Is it still possible to get replacement V700 multiport valves ?
Hi – that’s a brand/model we are not familiar with here in the US- but I did a quick google search for “V700 multiport valves” and found several listings for .au websites, so yes seems to be still available.
My Laser 225L Sand Filter is leaking from under where the flange connects to the filter, how can I check the o-ring under the flange to fix this? I don’t know how to remove the flange.
Hi Shu, filter valves are either clamped or bolted to the tank flange. You also will need to cut the PVC pipes connected to the valve, which can be later repaired with couplings, or unions, which are more expensive but allow you to quickly remove the valve in the future without cutting/repairing.
I have a 10 year old S244T Hayward filter. Currently it seems to be by-passing the filter setting and sending the “dirty” water back into the pool. When I backwash there’s not a lot of “dirty water in the discharge and you can see the color change in the pool. Over the last couple of seasons the handle of the valve sounds as if a plastic gear is stripping and skipping. Does all of this mean the valve it self needs replacing? Pressure was around 14# at install runs at 20 now.
thanks
Hi Al, you may need to replace the filter sand, especially if it is 10 yrs old, it is time. For the valve, it may also need a new spider gasket, which is mounted onto the bottom of the diverter. Replacing the Key assembly is the easy way to repair, see https://intheswim.com/p/spx0714ba-key-cover-and-handle-assembly/601665.html
I had water leaking out my waste line so I just replaced the entire Hayward SP0714T VariFlo Top-Mount Multiport Valve and got the same result. What else could it be? Overpowered pump?
Hi David, did you just replace the pump? Or the filter sand maybe? I have heard of filter valves leaking when some poorly graded filter sand was used. An over powered pump could definitely do it as well. I would open it up (the valve) and inspect the spider gasket. If you see no signs of wear or damage, then it would be that the flow (or pressure) is too great. Is the filter pressure higher this year than before? If there is no damage to the gasket or to the spring under the lid of the valve, then you would suspect an obstruction or restriction (dirty filter, bad sand, plugged returns, closed valves, clogged line, backwards plumbed MPV), or as you mention, an overpowered pump.
what would cause the water in my sand filter to leak off back into the pool when to power is shut off. inground pool.
Sally, that would be a small air leak somewhere on the filter, or around the pump. Not uncommon, and not really a problem. If you see a water leak around the filter when the filter is running, that is likely an air leak when the filter is off. The air slowly leaks into the filter, and the water runs out thru the pump, and back to the pool. Probably not something to be too worried about.